Monthly Archives: October 2025
Garden Weddings
| Season | Weather | Floral Appeal | Pros | Cons |
| Spring | Mild, breezy | Tulips, peonies, lilacs | Fresh blooms, soft colors | Unpredictable rain |
| Summer | Hot, sunny | Roses, hydrangeas | Long days, golden hour light | Heat, sun exposure |
| Fall | Cool, crisp | Dahlias, marigolds | Bold colors, fewer bugs | Shorter daylight |
| Winter | Cold, dry | Evergreens, berries | Cozy vibe, off-season rates | Requires heaters, limited blooms |
Why Garden Weddings Are an Ideal Choice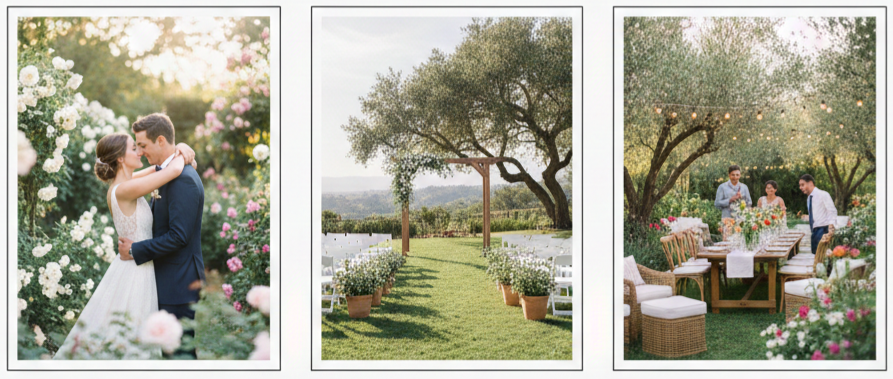
Garden weddings feel personal, beautiful, and naturally inviting. When we choose a garden setting, we get a space that already looks styled because the greenery, flowers, and open sky create a built-in backdrop. That means we can keep décor simple while still getting a polished look that photographs well from every angle.
A garden also makes it easier to shape the day around the experience we want. We can create an intimate ceremony layout, set up a relaxed cocktail space under trees, and design a reception that feels open and social. Garden weddings also suit couples who want a more eco-conscious celebration, since we can lean on seasonal elements and reuse or repurpose décor more easily than in a fully blank indoor venue.
Best Seasons For A Garden Wedding
Choosing the season affects comfort, lighting, flowers, and even how the venue looks in photos. Each season has its own strengths, so we plan around what matters most, then build a weather backup plan that matches the season.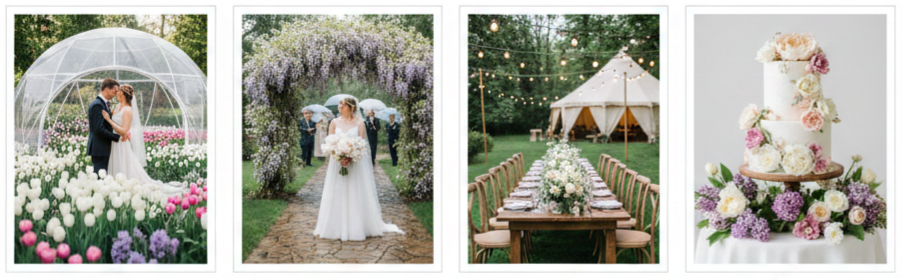
Spring
We get fresh blooms, mild temperatures, and that classic garden look with flowers like tulips, peonies, and lilacs. We also plan for quick rain changes with umbrellas, covered walkways, or a tent option.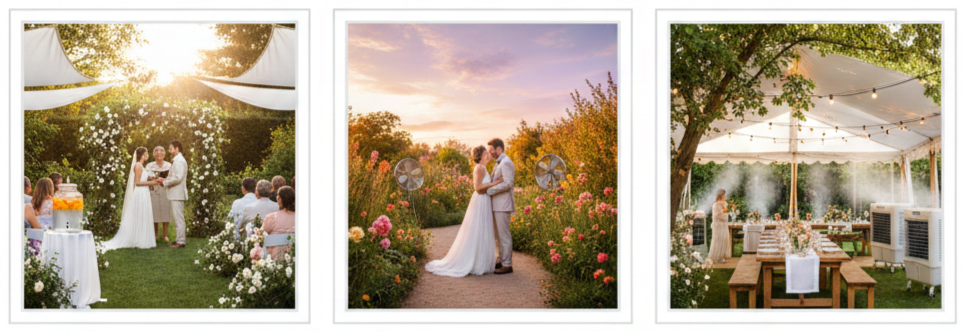
Summer
We get long daylight hours and vibrant greenery, which makes late-day ceremonies and sunset photos look incredible. We also plan for heat with shade, water stations, and airflow around seating.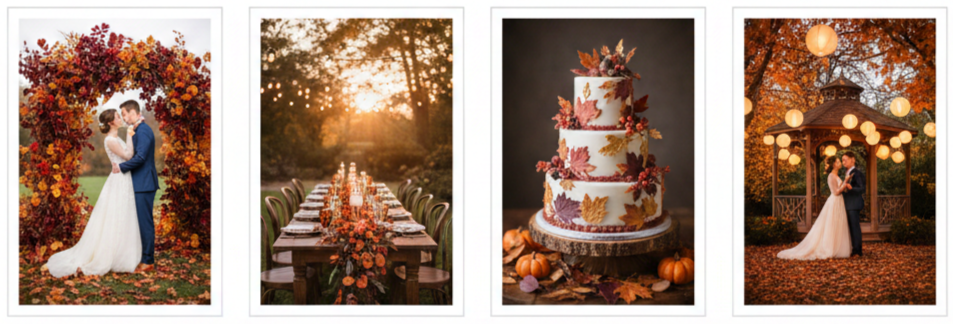
Fall
We get rich color, cooler air, and a naturally romantic feel with foliage tones that elevate the setting without extra décor. We also prepare for earlier sunsets with lighting that comes on sooner.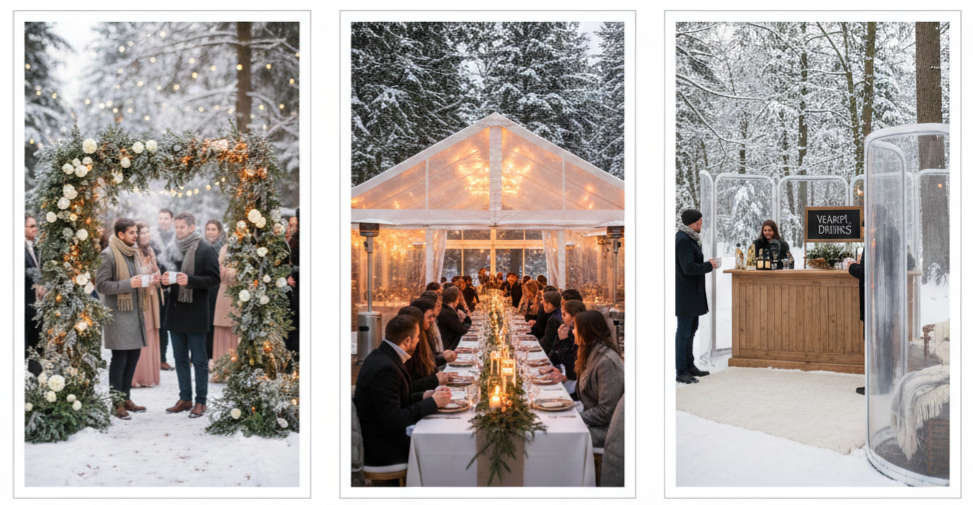
Winter
We get a unique atmosphere with evergreens, warm lighting, and a cozy mood that feels intimate. We also plan for heated tents, warm drink service, and wind protection.
Key Takeaway: We pick a season that supports the look we want, then we build a weather-ready plan that keeps the day comfortable and on schedule.
How To Choose The Perfect Garden Venue
A garden venue should look great and function smoothly. We look past the first impression and confirm the practical details that keep guests comfortable and vendors efficient. We also visit at the same time of day as the ceremony to see how the sun hits the space and how the garden feels when it’s actually in use.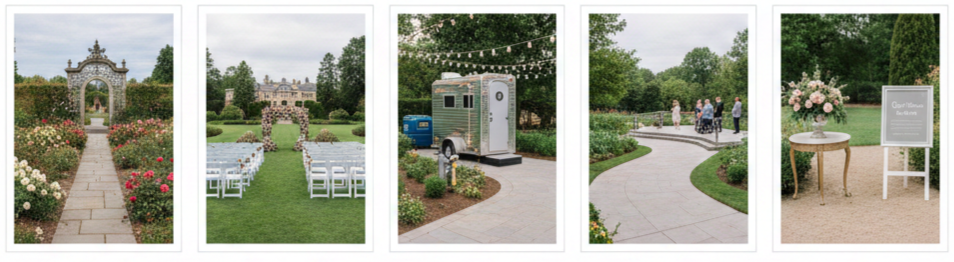
- Venue Type: We decide between public botanical gardens, private estates, or a backyard-style space, since each option comes with different rules, costs, and flexibility.
- Guest Capacity: We confirm how many people the garden comfortably fits when we include the aisle, seating, cocktail space, tables, dance area, and vendor zones.
- Amenities: We check restrooms, electricity, water access, parking, and storage areas, since missing basics can create expensive last-minute rentals.
- Accessibility: We look at pathways, slopes, and terrain for guests who need stable footing, and we plan surfaces for heels, mobility devices, and older guests.
- Restrictions: We confirm noise limits, end times, décor rules, and any requirements for approved vendors or insurance.
Elegant Garden Wedding Décor Ideas
In a garden, décor works best when it supports the setting instead of trying to overpower it. We use the landscape as the base and add details that guide the eye, define spaces, and create a warm mood once the sun goes down. The goal is to make the day feel intentional from the ceremony entrance to the final dance.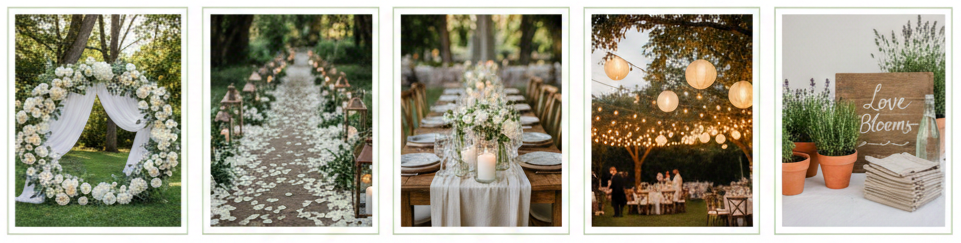
- Ceremony Backdrop: We use floral arches, greenery frames, or soft draping on wood structures to create a focal point that fits the natural surroundings.
- Aisle Styling: We line the aisle with petals, lanterns, small arrangements, or low greenery to frame the walk without blocking views.
- Table Design: We use linen runners, simple centerpieces, candlelight, and natural textures like wood and glass to keep the look cohesive and elegant.
- Lighting: We layer string lights, hanging bulbs, lanterns, and pathway lighting so the space stays inviting after sunset.
- Sustainable Details: We choose local seasonal flowers, rented pieces, reusable signage, and potted plants that can be replanted or gifted after the event.
What To Wear: Garden Wedding Outfit And Footwear Tips
Garden weddings look effortless when outfits match the setting and the weather. We aim for comfort that still looks polished, especially since outdoor celebrations involve more walking, changing temperatures, and uneven ground. Clothing choices also affect photos, since outdoor light highlights fabric texture and movement.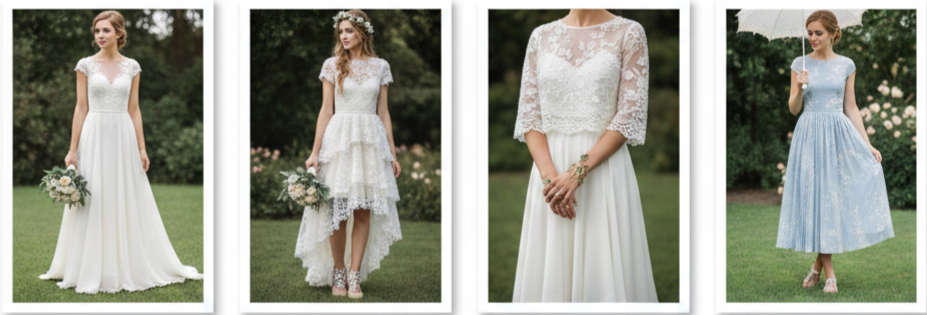
Bridal Style
We choose breathable fabrics like chiffon or lace for comfort, and we avoid overly long trains that drag through grass and pathways.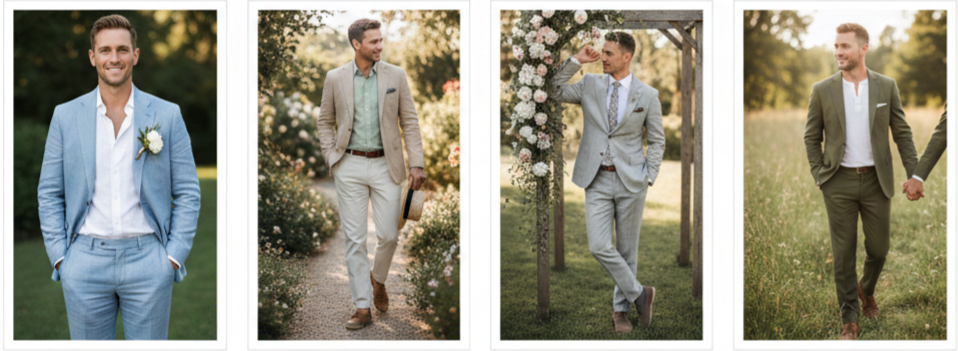
Groom Style
We use lighter fabrics like linen or cotton in warmer months, and we pick colors that work well in natural light without looking too formal for the setting.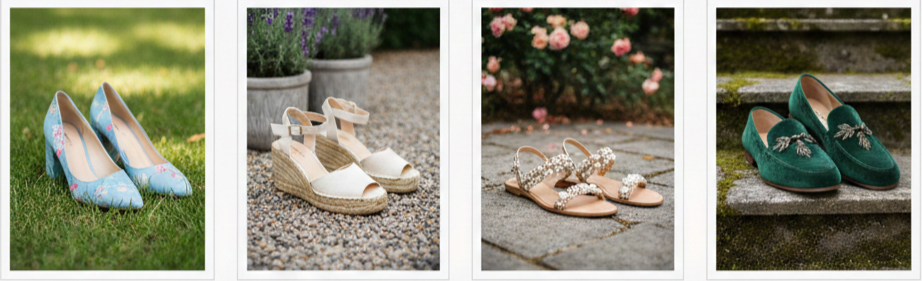
Footwear
We choose block heels, wedges, or flats so we can move confidently on grass or gravel without sinking or twisting ankles.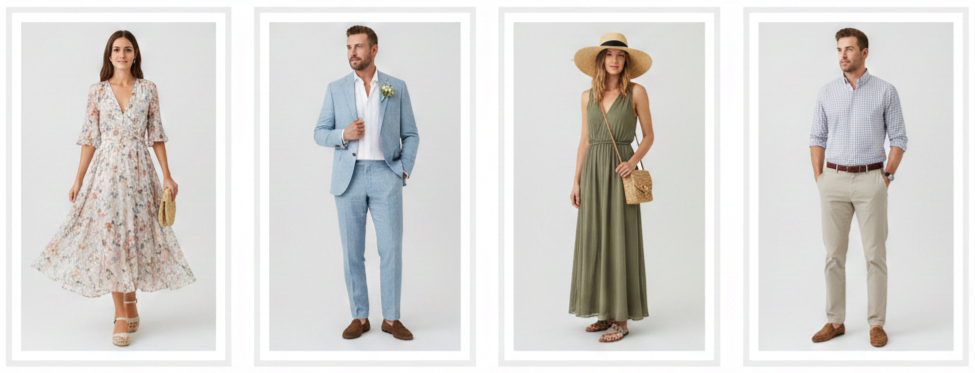
Guest Dress Code
We guide guests toward comfortable outdoor-friendly outfits, especially for warm afternoons, cooler evenings, or venues with soft ground.
How To Prepare For Weather At Outdoor Weddings
Outdoor weddings succeed when we plan for weather in a way that feels seamless and calm. We treat the weather plan as part of the design instead of an emergency fix. That means we prepare for sun, wind, humidity, temperature drops, and rain without making the space feel like a compromise.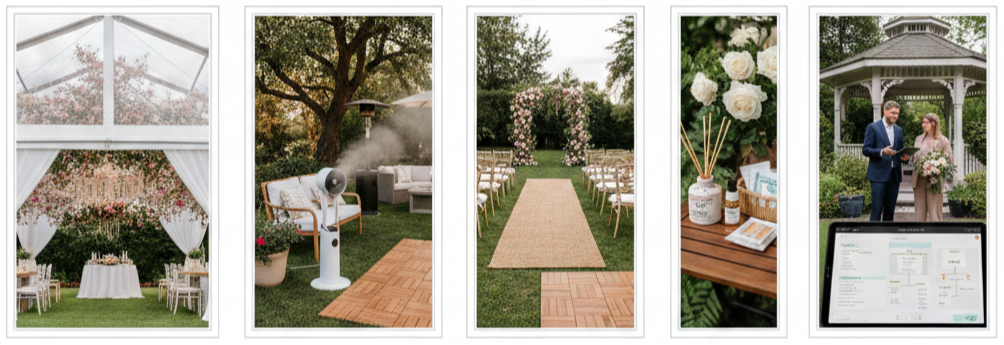
- Shelter Plan: We use tents, canopies, or covered structures that protect guests while preserving the garden atmosphere, including clear-top options for natural light.
- Temperature Control: We set up fans, shaded seating, misting options, or heaters depending on the season, and we keep high-heat or high-wind areas in mind.
- Ground Protection: We add flooring, rugs, or walkway runners to prevent muddy shoes, uneven footing, and trouble spots near bars or entrances.
- Pest Strategy: We schedule professional treatment when allowed, and we add discreet solutions like citronella elements and a small guest-accessible bug spray station.
- Communication Plan: We share backup details with vendors early so transitions stay smooth and the timeline remains realistic even with changes.
Ceremony And Reception Layout Tips
A garden wedding feels better when the flow makes sense. We design the space so guests always know where to go, vendors have clear working paths, and the experience stays comfortable. Layout also affects sound and photography, so we place key moments where everyone can see and hear without crowding.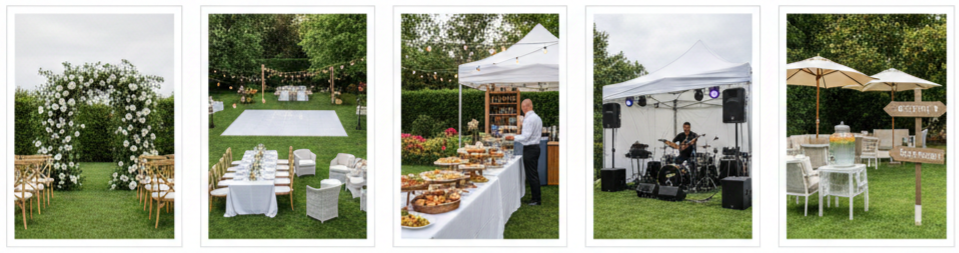
- Ceremony Positioning: We orient seating so guests avoid direct sun in their eyes, and we choose a spot that stays visually balanced in wide photos.
- Reception Zones: We create separate areas for dining, dancing, and lounging so guests can move naturally without congestion.
- Food And Bar Placement: We position stations to reduce lines, keep traffic away from the ceremony space, and support easy service flow.
- Entertainment Setup: We plan speaker placement, power access, and weather protection for music equipment so the sound stays clear and consistent outdoors.
- Comfort Touches: We include shaded seating, water access, and clear signage so guests stay relaxed without needing to ask where to go.
Permits, Insurance, And Legal Considerations
Garden venues can come with rules that influence timelines, décor, and music. We handle permits and requirements early so nothing interrupts the day. Even private venues can have neighborhood rules or local ordinances, so we confirm details before finalizing major vendors.
- Permits: We check whether the venue requires permits for gatherings, amplified music, alcohol service, or large installations like tents.
- Noise Rules: We confirm volume limits and music cutoff times, especially in residential areas or public gardens with strict policies.
- Event Insurance: We secure liability coverage when needed, and we provide documentation when the venue requires proof before setup.
Photography Tips For Garden Weddings
Garden weddings can produce stunning photos, especially when we plan around light and scenery. We coordinate timing so the best natural light aligns with portraits, ceremony moments, and key reception shots. We also identify backup photo spots early, since outdoor light can shift quickly with clouds or wind.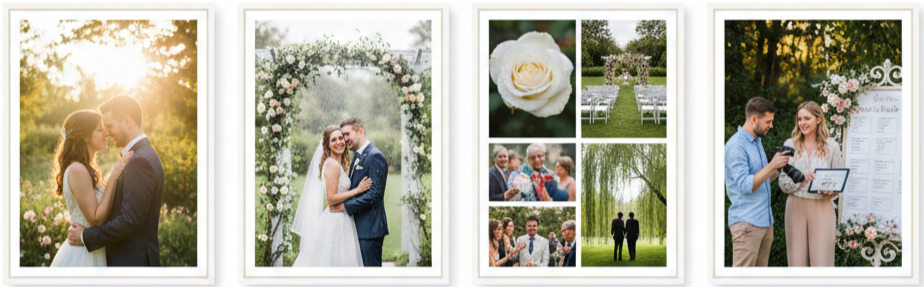
- Golden Hour Planning: We reserve time for portraits in the hour before sunset for soft light that flatters skin tones and highlights greenery.
- Shade And Rain Options: We identify covered areas, pergolas, or tent edges that still look elegant in photos during harsh sun or light rain.
- Must-Capture Moments: We plan wide shots of the ceremony space, close-ups of natural details, candid guest reactions, and couple portraits framed by flowers or trees.
- Vendor Coordination: We share the venue layout and timeline with the photographer so they can move efficiently and stay ready for fast-changing outdoor conditions.
Common Garden Wedding Mistakes To Avoid
Garden weddings can feel effortless, yet small oversights can affect guest comfort and the overall flow. We avoid these common issues by planning around the realities of outdoor events and making decisions that support the experience from start to finish.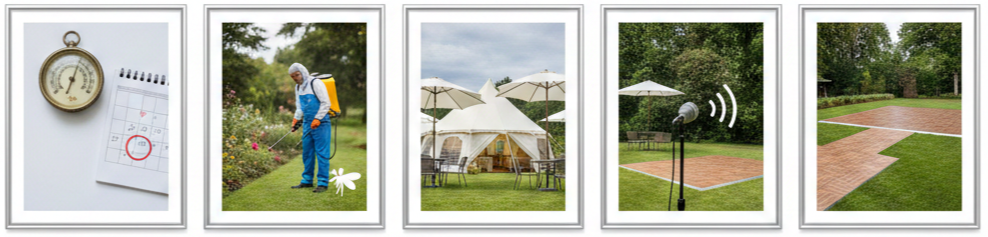
- Weather History Oversight: We check typical conditions for the date and location instead of relying on guesswork, then we plan shelter and timing accordingly.
- Pest Control Skipped: We handle bugs proactively so food service and seating areas stay comfortable.
- Shade Not Considered: We add shade options for ceremonies in direct sun and for cocktail areas during warm hours.
- Sound Underestimated: We use microphones and do a sound check, since outdoor spaces absorb sound and guests still need to hear vows and speeches.
- Terrain Ignored: We plan pathways and stable flooring in high-traffic zones, especially near seating, bars, and dance areas.
Conclusion
Garden weddings offer a naturally stunning setting that feels relaxed, elegant, and memorable without needing heavy décor. When we plan the season, venue logistics, layout, and weather setup with care, the celebration flows smoothly and guests stay comfortable from the ceremony to the reception. The result is a day that feels intentional and beautiful, with nature adding atmosphere in every photo and every moment.
Key Takeaway: A garden wedding feels effortlessly special when we match the season to the setting, plan for weather and terrain, and design a layout that keeps guests comfortable and the celebration moving smoothly.
FAQs
How do we keep guests comfortable during a garden wedding without overcomplicating the setup?
We focus on shade, hydration, seating, and clear pathways. We also add small comfort touches like hand fans for warm days or light blankets for cooler evenings, especially when the reception runs past sunset.
Do garden weddings usually end earlier because of noise rules?
Some venues enforce strict cutoff times, especially in residential areas or public gardens. We confirm music limits and end times early, then we structure the timeline so key moments like speeches and dancing happen before restrictions apply.
Can we serve a full dinner outdoors without risking food quality?
Yes, with the right catering plan. We work with vendors who use covered prep areas, temperature-safe holding methods, and efficient service flow, and we avoid leaving food exposed in direct sun or windy spots.
How do we handle guest footwear expectations without sounding controlling?
We set a clear dress code note that highlights practical details, such as “grassy terrain” or “garden pathways.” Guests appreciate guidance when it’s framed as comfort-focused and specific to the venue.
What’s a smart way to create privacy in a public garden setting?
We use layout and design to create separation, including strategic ceremony placement, tall floral installations, greenery screens, and controlled entry points. We also time the event around less crowded hours when possible.
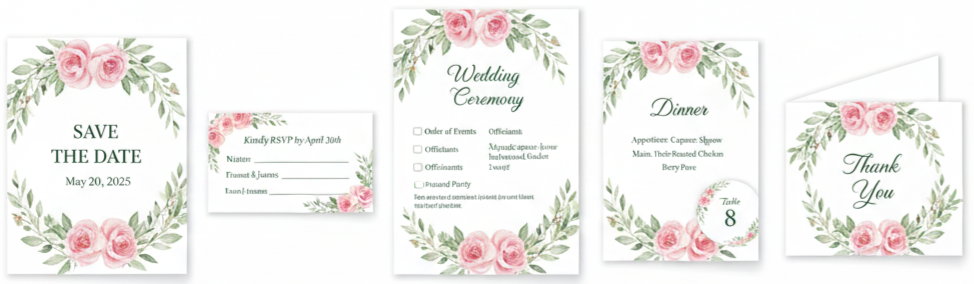
Garden Wedding Invitations
| Item | When to Send |
| Save-the-Date Cards | 6–9 months before the wedding |
| Formal Invitations | 8–12 weeks before the wedding |
| RSVP Deadline | 4 weeks before the wedding |
| Order Invitations | 4–6 months before mailing date |
| Mail International Invites | 10–12 weeks before the wedding |
Why Garden Weddings Deserve Their Own Kind of Invitations
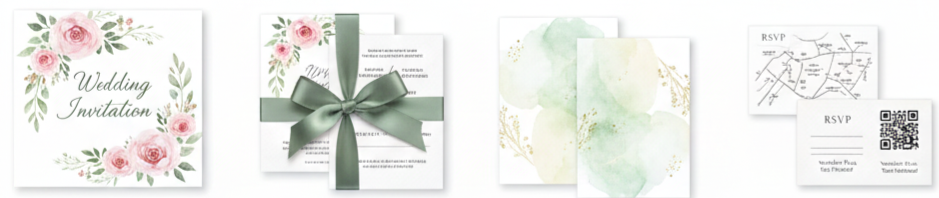
Garden weddings feel relaxed, romantic, and naturally beautiful, so the invitation needs to match that mood from the first glance. Your card sets expectations for everything your guests are about to experience, from the vibe of the venue to how formal the day feels. Since you’re celebrating outdoors, your design choices can lean into soft florals, airy color palettes, and nature-inspired details that feel right at home in a garden setting.
A garden invitation also does a practical job. Outdoor celebrations come with extra guest questions, like what shoes to wear on grass, what the weather plan is, and how to find the exact ceremony spot. When your invitation suite handles those details clearly, your guests feel prepared and excited, not confused.
Top Garden Wedding Invitation Styles You’ll Love
Choosing a style gets easier when you start with the feeling you want your guests to have when they open the envelope. Some couples want something classic and romantic, while others want clean and modern with subtle greenery. Garden invitations work across a wide range of aesthetics, as long as they keep a natural, fresh look.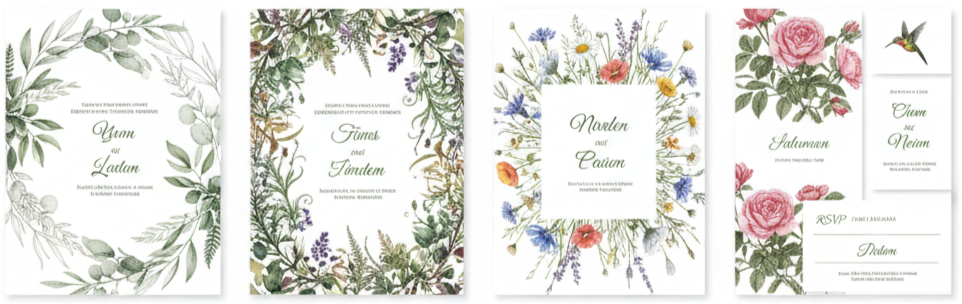
Botanical Illustrations
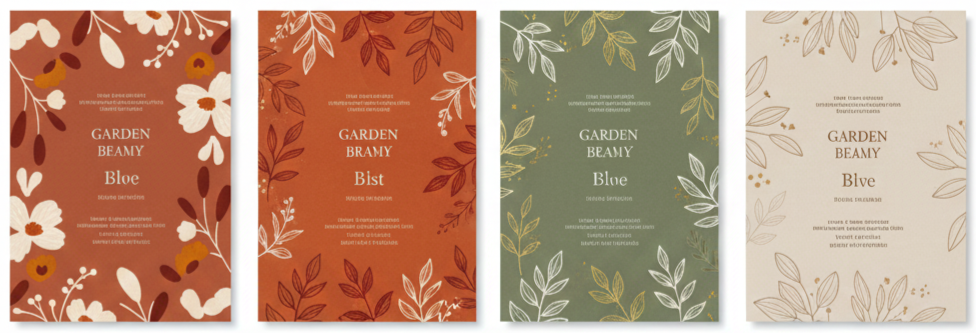
This style uses hand-drawn leaves, vines, ferns, herbs, or wildflowers to create a timeless look. It feels elegant without being too formal and works especially well for couples who want nature to be the main “theme” instead of heavy wedding motifs. 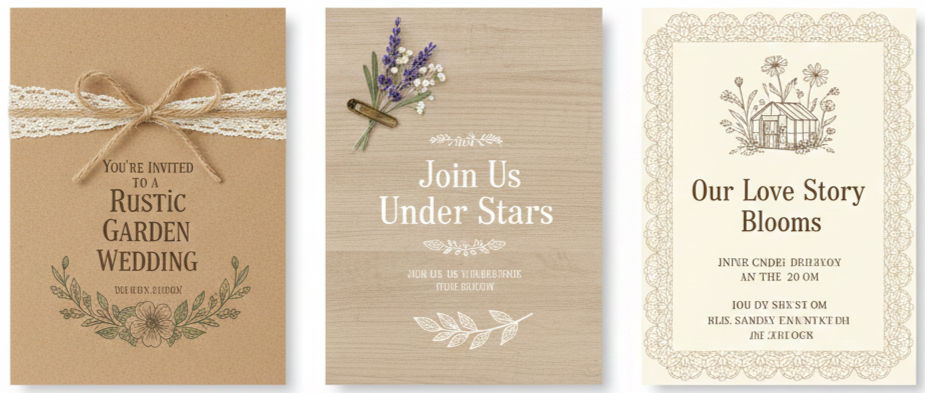
Rustic Charm
Rustic invitations lean into earthy textures and cozy details. Kraft paper, twine, lace accents, or subtle woodgrain backgrounds fit backyard ceremonies, greenhouse venues, and garden receptions with farmhouse décor.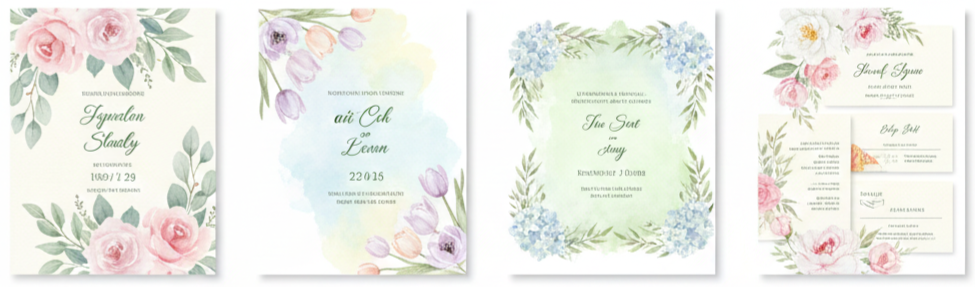
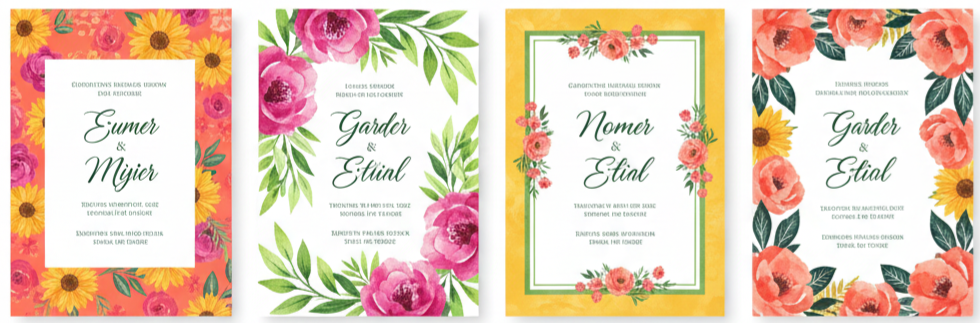
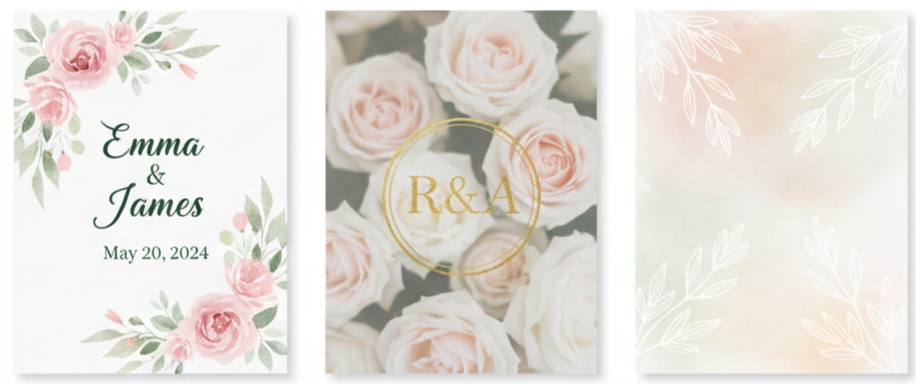
Watercolor Florals
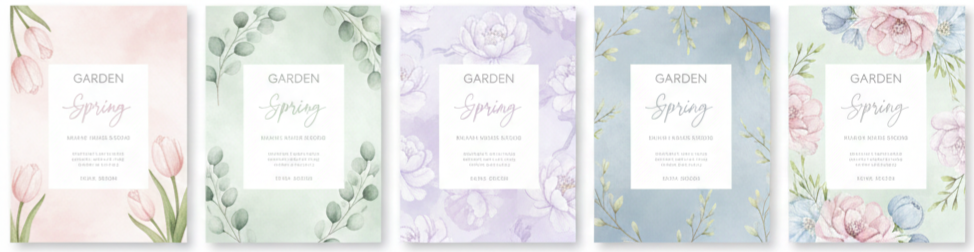
Watercolor designs feel soft, romantic, and artistic. They’re great for spring and summer weddings, especially when you want pastel blooms and gentle greenery that look painted by hand.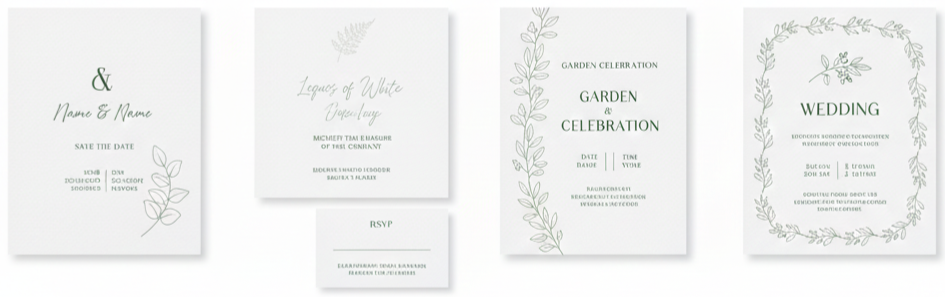
Minimalist Nature
If you like clean layouts, this style focuses on simple typography, lots of white space, and small botanical touches like a single sprig or leaf border. It looks modern, airy, and polished.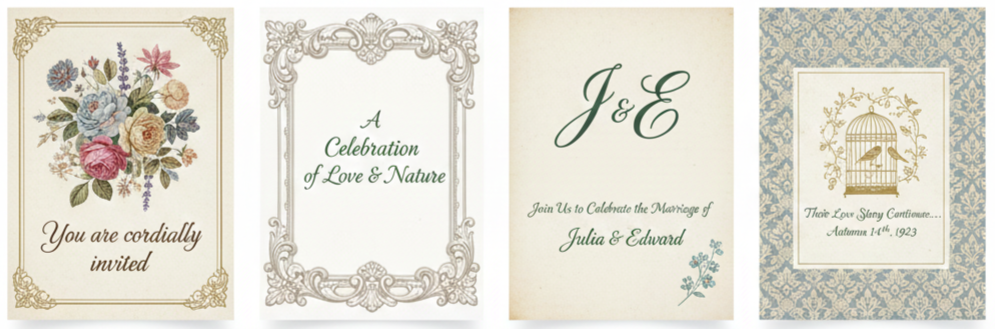
Vintage Garden
Vintage designs pull from antique botanical prints, classic frames, and traditional calligraphy. Faded tones, old-world patterns, and elegant scripts make the invitation feel timeless and refined.
How to Pick the Right Color Palette for Your Invitations
Color is where your garden invitation really starts to feel connected to your wedding. A good palette should complement the season, work with your florals, and stay easy to read. It’s tempting to use very light ink on light paper because it looks soft and dreamy, yet clarity matters more than aesthetics when guests are trying to read times, addresses, and RSVP instructions.
Spring Colors
Pastels like blush, sage, lilac, and soft blue feel fresh and romantic. These shades pair beautifully with tulips, peonies, and new greenery.
Summer Colors
Brighter tones like coral, sunflower yellow, fuchsia accents, and rich greens match bold blooms and sunny outdoor lighting.
Fall Colors
Earthy shades like terracotta, rust, olive, and warm neutrals pair well with changing leaves and late-season florals.
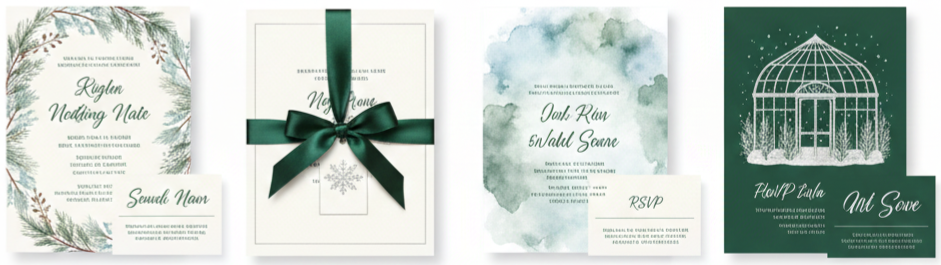
Winter Garden Colors
If your venue is a conservatory or greenhouse, cooler tones like ivory, silver, icy blue, and deep evergreen can feel elegant and seasonally appropriate.
Keep contrast in mind. Dark text on light backgrounds remains the easiest to read, especially for older guests. If you love pale ink, use it for decorative accents while keeping key details in a darker shade.
Garden-Themed Wording Ideas to Make Your Invites Stand Out
Your wording should feel like you, while also matching the setting. Garden weddings tend to lean romantic, warm, and welcoming, so you can use language that feels a little more personal than a traditional ballroom invitation. You can still keep it formal, yet a gentle nature-inspired line can make the whole suite feel more intentional.
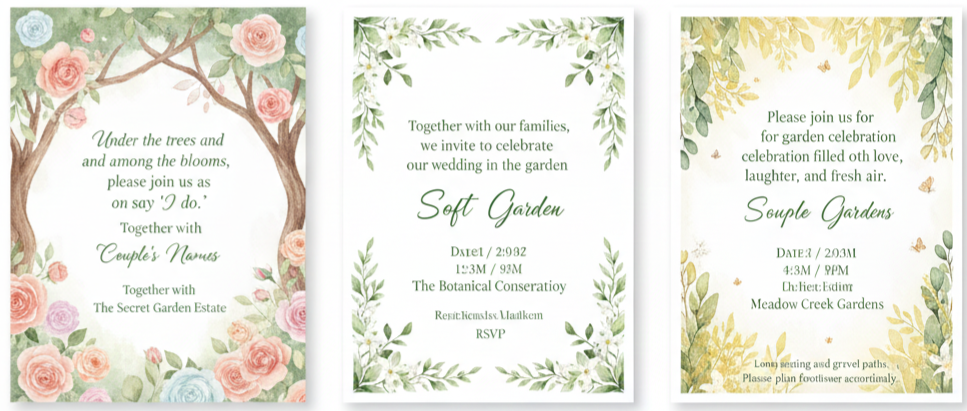
- Romantic Garden Line: “Under the trees and among the blooms, please join us as we say ‘I do.’”
- Soft Nature Line: “Together with our families, we invite you to celebrate our wedding in the garden.”
- Light And Sunny Line: “Please join us for a garden celebration filled with love, laughter, and fresh air.”
No matter what tone you choose, the important details should be clear and complete. Guests should instantly know the date, time, exact location, how to RSVP, and what to expect for attire. Outdoor venues also benefit from a short note about the setting, like lawn seating, gravel paths, or a ceremony in a meadow, so guests can plan shoes and layers without guessing.
Best Invitation Formats and Materials for a Garden Wedding
Your format and materials shape how the invitation feels in someone’s hands. Garden weddings pair beautifully with textured paper, natural finishes, and layered elements that feel organic. At the same time, you’ll want materials that hold up well during mailing and look clean when opened.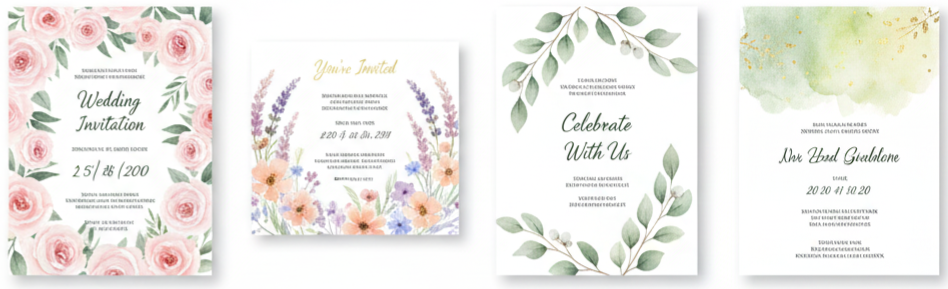
Traditional Flat Cards
Flat invitations feel classic and simple. They work for nearly any style, and they’re easy to mail. If your design includes florals or watercolor artwork, a flat card layout keeps the focus on the illustration.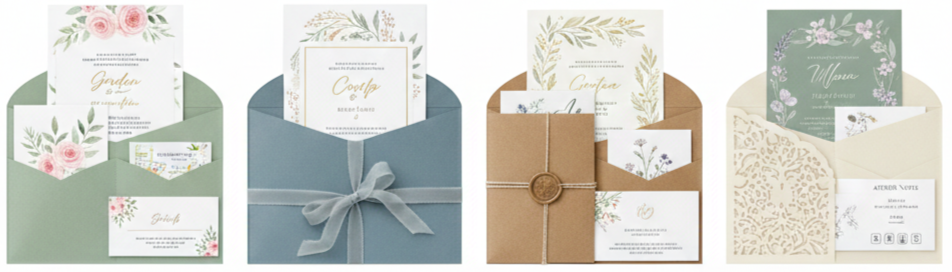
Pocket Or Folio Invitations
This format keeps everything organized in one place. It’s useful when you have multiple inserts like RSVP cards, weekend schedules, maps, and attire notes.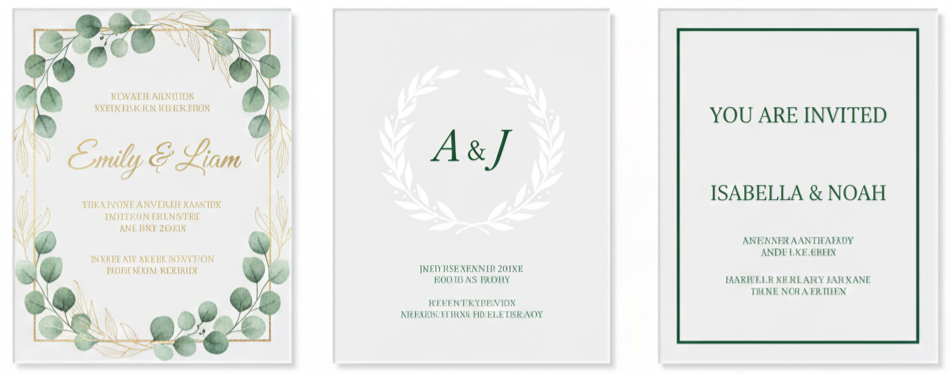
Acrylic Invitations
Acrylic invites feel modern and upscale. They’re also less likely to wrinkle or bend. They pair well with minimalist greenery, metallic ink, and clean typography.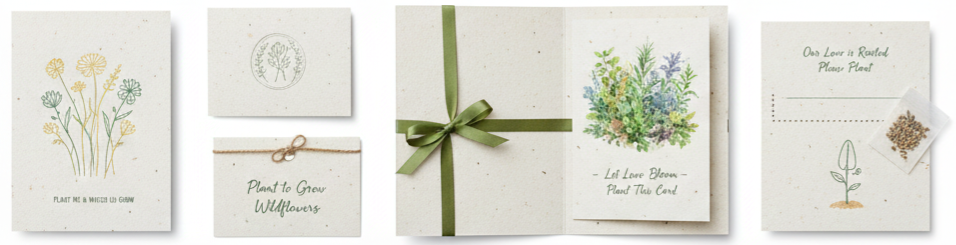
Seeded Paper
Seeded paper is made to be planted, so guests can grow wildflowers or herbs later. It’s a meaningful choice for couples who want an eco-friendly option that fits a garden theme naturally.
Vellum Overlays
Vellum adds a soft, romantic layer to your suite. You can print names, monograms, or delicate botanicals on vellum and place it over a floral card for a high-end look.
Materials should match your venue and vibe. A formal garden estate may look best with thick cotton paper and letterpress, while a casual backyard celebration might feel right with recycled stock and watercolor florals.
Printing Techniques That Take Your Invites to the Next Level
The printing method changes the entire look and feel of your invitation. Some techniques add texture you can feel, while others focus on shine or rich color. The best choice depends on your design style, your budget, and how dramatic you want the final result to feel.
- Letterpress: Letterpress presses text into thick paper, creating a deep, tactile impression. It looks especially elegant with botanical themes, classic typography, and vintage garden aesthetics.
- Foil Stamping: Foil adds shine and catches the light beautifully. Gold, rose gold, and copper work well for floral frames, leaf details, or formal text that needs a little sparkle.
- Digital Printing: Digital printing is affordable and great for watercolor art, detailed florals, and full-color designs. It’s the easiest option when you want lots of color variation without the cost of specialty presses.
- Embossing Or Debossing: Embossing raises details up from the paper, while debossing presses them in. Both add dimension and give your invitations a refined finish without needing metallic foil.
If you’re using layered materials like vellum or acrylic, do a test print first. It’s important to confirm the ink looks crisp and readable on the surface you choose.
Build a Matching Stationery Set for a Cohesive Look
A cohesive suite ties your wedding details together and makes the whole event feel thoughtfully planned. You don’t need a massive collection of paper goods, yet keeping your fonts, colors, and floral elements consistent creates a polished look from start to finish.
- Save-The-Dates: Save-the-dates set the tone early. Using the same garden motif or color palette helps guests recognize your wedding style right away.
- RSVP Cards: RSVP cards look best when they match your main invitation design. Keep the layout simple so guests can respond easily without confusion.
- Programs: Programs can echo your florals and typography while staying easy to read. For outdoor ceremonies, thicker paper helps them hold their shape.
- Menus And Table Cards: Coordinating menus and place cards make the reception décor feel intentional. A small floral detail or matching font can be enough to tie everything together.
- Thank-You Cards: Thank-you cards feel more meaningful when they reflect the same garden theme. They also become a nice keepsake after the event.
- Small extras can add a lot of charm. Wax seals, envelope liners, belly bands, and ribbon ties all work beautifully with garden themes, as long as they don’t make the invitation too bulky to mail.
Tips for Mailing Your Garden Wedding Invitations
Mailing is where beautiful invitations either arrive perfectly or get damaged in transit, so it’s worth handling with care. Planning your send-out timing also helps guests RSVP on time, book travel, and prepare for an outdoor venue.
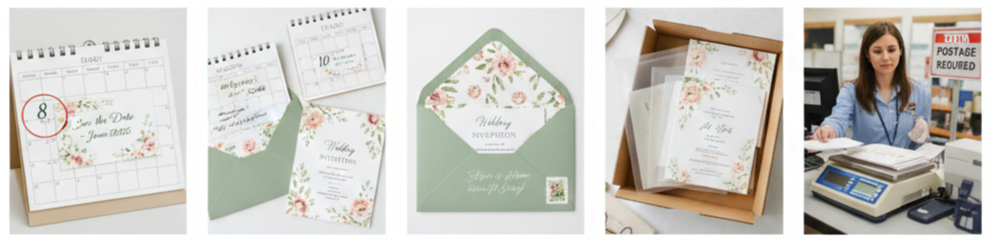
- Save-The-Dates Timing: Send save-the-dates around 6 to 8 months before the wedding, especially if guests need to travel.
- Invitation Timing: Send formal invitations about 8 to 10 weeks before the wedding so guests have time to RSVP and plan.
- Envelope Styling: Calligraphy, clean printed addresses, botanical liners, and matching stamps keep the garden look consistent from the outside in.
- Protection For Delicate Suites: Acrylic pieces, vellum layers, and thick paper benefit from protective sleeves. A structured mailer can also prevent bending.
- Postage Check: Heavier or oddly shaped suites often need extra postage. We recommend bringing a fully assembled invitation to the post office to confirm the correct stamp amount before you mail everything.
If your invitation has multiple layers or embellishments, mail one to yourself first. It’s the easiest way to see how it holds up and whether anything shifts during transit.
Conclusion
Garden wedding invitations should feel like the first chapter of your wedding story. When your design matches your venue, your palette complements the season, and your wording feels warm and clear, your guests instantly understand the vibe you’re creating. Whether you choose watercolor florals, botanical sketches, minimalist greenery, or a vintage-inspired suite, the right details make your invitation feel personal, polished, and ready for a beautiful outdoor celebration.
Key Takeaway: Garden wedding invitations look and feel their best when the design, colors, materials, and print style reflect the outdoor setting while keeping every detail clear and easy for guests to follow.
FAQs
How do we make garden wedding invitations feel personal without adding too many extras?
You can personalize the suite through small details that don’t add bulk, like a custom monogram, a short line about your venue, or a floral motif inspired by your bouquet. A single meaningful touch usually feels more intentional than layering multiple embellishments.
What’s the best way to share outdoor ceremony details without cluttering the invitation?
Use a separate details card or a small insert that covers outdoor notes like terrain, seating, and weather plans. Keeping those notes off the main invitation helps the primary card stay clean while still giving guests what they need.
How do we choose fonts that fit a garden theme and stay easy to read?
Pair one decorative font with one clean font. Use the decorative option for names or headings and the clean font for the date, time, and location. This keeps the invitation pretty and practical at the same time.
What invitation details matter most for guests attending a garden wedding for the first time?
Guests usually want clear timing, exact location directions, footwear guidance, and an easy RSVP method. A quick line about the outdoor setting also helps guests plan layers, sun protection, or a wrap for evening temperatures.
How do we keep a floral design from looking too busy on the main invitation?
Choose one focal area for florals, like a border or corner cluster, and leave breathing room around the text. A clean layout with controlled floral placement keeps the design elegant and prevents the details from getting lost.
Garden Wedding Hairstyles
| Hairstyle Type | Best For | Weather Suitability | Accessory Match |
| Low Bun Updo | Formal garden look | High heat, wind | Veil, pearl pins |
| Braided Chignon | Textured elegance | Mild to warm | Greenery, floral clips |
| Half-Up Twist | Soft, romantic vibe | Light wind | Veil, small flowers |
| Beachy Waves | Casual, boho feel | Calm, low humidity | Flower crown |
| Fishtail Braid | Rustic/fairytale | Windy, mild heat | Small blooms |
| Milkmaid Braid | Vintage theme | All conditions | Greenery, combs |
| Side-Swept Curls | Glam outdoor style | Mild breeze | Jeweled pins |
What To Keep In Mind Before Picking a Hairstyle
A garden wedding usually feels light, romantic, and a little bit magical, which means your hair needs to look great in photos and hold up in real outdoor conditions. We want a style that matches the natural setting without feeling stiff or overly done, and we also want it to stay comfortable from the ceremony through the last dance.
- Weather and Venue Conditions: Outdoor spaces bring wind, humidity, sun, and temperature changes. A breezy garden can loosen curls faster, while humidity can turn sleek styles into frizz, so we plan for the most likely conditions at your venue.
- Your Hair Type and Length: Short hair, long hair, thick hair, fine hair, curly hair, straight hair, and textured hair all behave differently outside. We choose a style that works with your natural density and texture so it looks intentional instead of forced.
- Your Dress Neckline and Overall Look: A high neckline or detailed back might look best with an updo, while a strapless or sweetheart neckline can look gorgeous with soft waves. We aim for balance so the hair and dress feel like they belong together.
- Comfort and Wear Time: Garden weddings often include walking on grass, mingling, and long photo sessions. We pick a style you can wear for hours without feeling like pins are poking or the crown is slipping.
- Accessories and Florals: Veils, combs, pins, flower crowns, and greenery can elevate the hairstyle, yet they also add weight and movement. We choose accessories that feel secure and look natural with the garden theme.
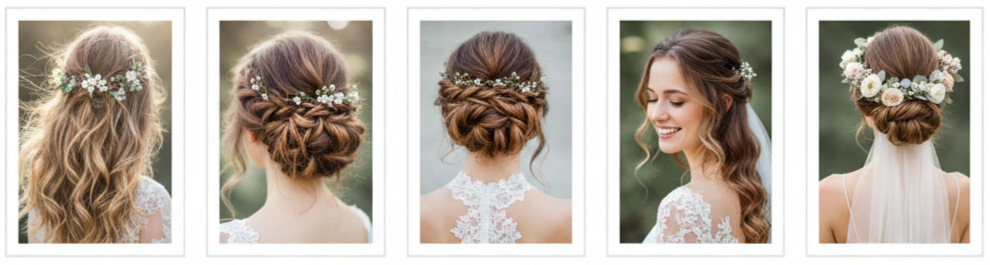
Romantic Updos That Work Outside
Updos are a favorite for garden weddings because they look polished, keep hair off your neck, and stay more controlled in warm weather. They also show off earrings, necklines, and back details beautifully, which matters a lot in outdoor lighting and photography.
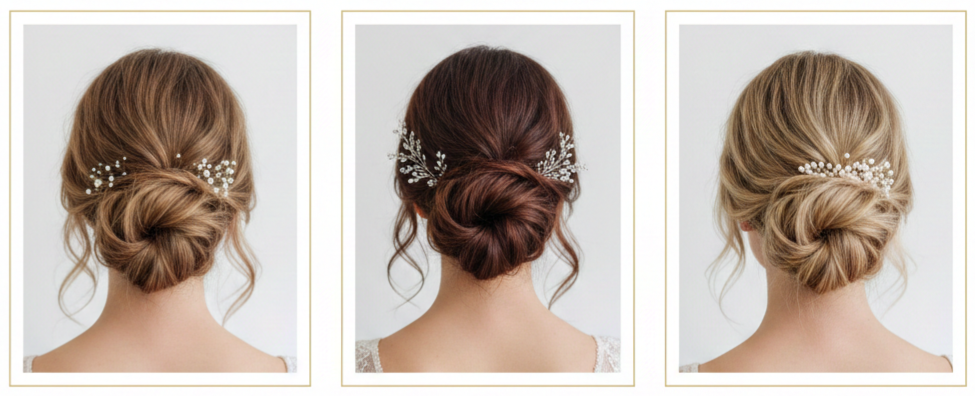
Low Bun with Soft Face-Framing Pieces
A low bun gives timeless romance, especially when we leave a few soft strands around the face for a relaxed finish. This style works well for formal gardens and more casual floral venues alike.
Braided Chignon with Garden Texture
A braided chignon adds shape and dimension, so it looks detailed even from a distance. We can tuck small accents like baby’s breath or delicate greenery into the braid pattern for a natural, blended look.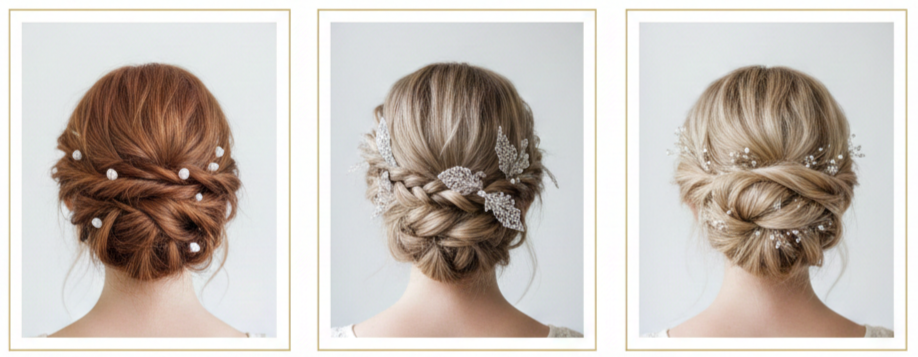
Twisted Updo with Pins or Pearls
Twists create a smooth, airy feel without looking too structured. Pearl pins, lace-inspired clips, or tiny crystal pieces can add a soft glow that catches sunlight without looking too flashy.
Side-Swept Updo for a Romantic Profile
A slightly off-center updo can create a flattering silhouette and helps highlight one side of the face. This option pairs especially well with side-parted styles and statement earrings.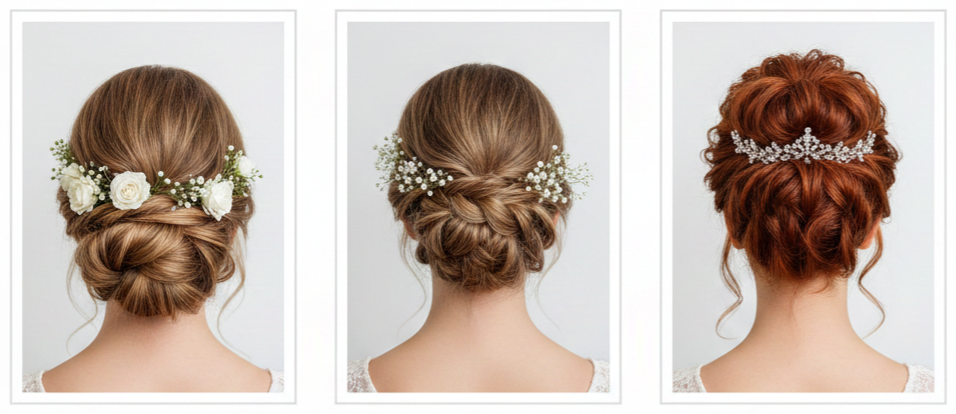
Updo Placement for Stability
Low and mid-level updos usually handle wind better than very high buns, especially when the ceremony and photos happen in open spaces with less shelter.
Half-Up, Half-Down Styles for the Win
Half-up, half-down styles give you the softness of flowing hair with the practical bonus of keeping pieces away from your face. They’re a great match for garden weddings because they look effortless, romantic, and photo-friendly from every angle.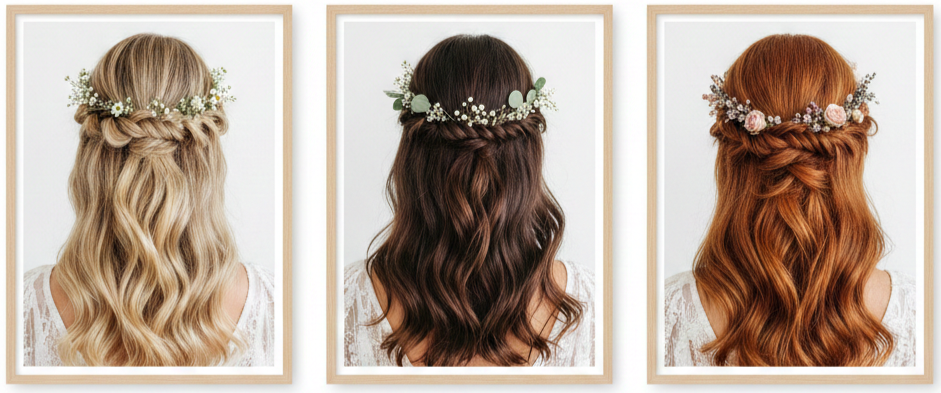
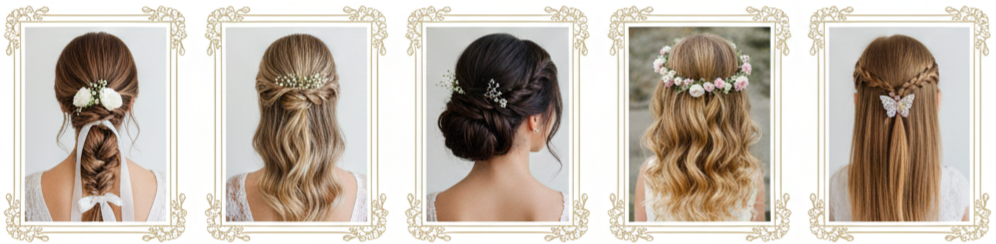
Boho Waves with a Crown Braid
Loose waves paired with a crown braid feel airy and natural. This style blends beautifully with outdoor florals and works well for brides who want a relaxed, slightly whimsical vibe.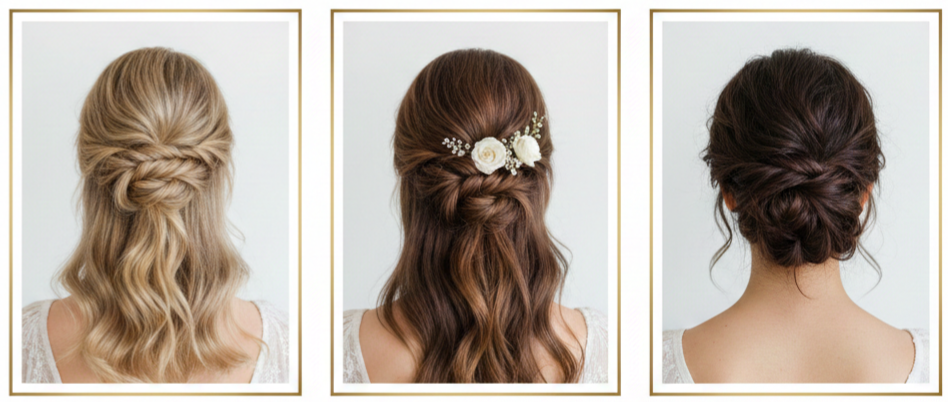
Twisted Half-Up with Gentle Volume
A twist-back style adds lift at the crown and creates a soft frame without feeling heavy. It’s also a nice choice when you want something elegant yet simple.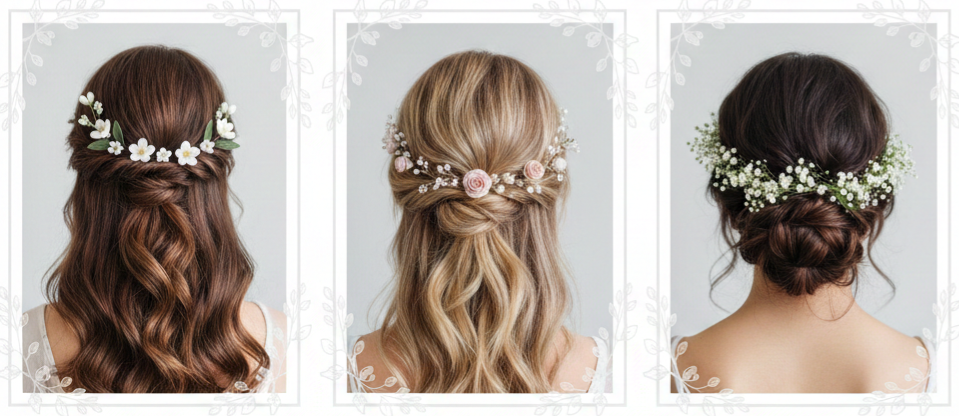
Curls with Floral Clips or Vines
Soft curls look amazing in garden light, and small floral clips can add detail without overpowering your face. We can place the flowers along the back or tuck them near the twist points to keep everything secure.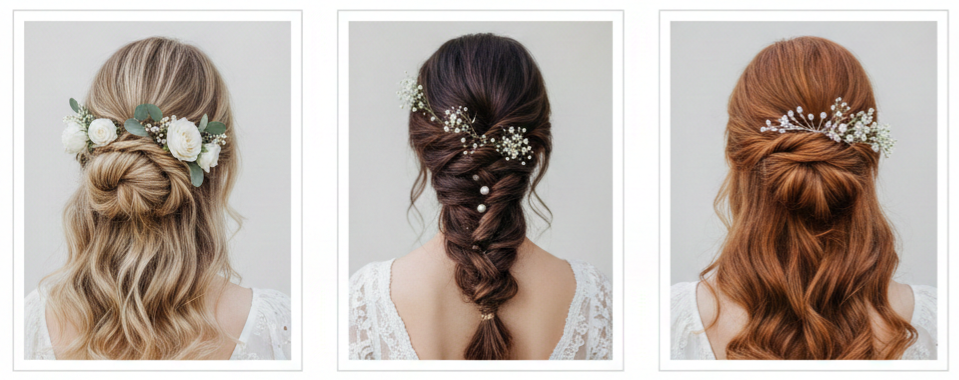
Half-Up Structure for Wind Contro
Pinning the top section helps reduce tangling and keeps hair from blowing into your face during the ceremony and portraits.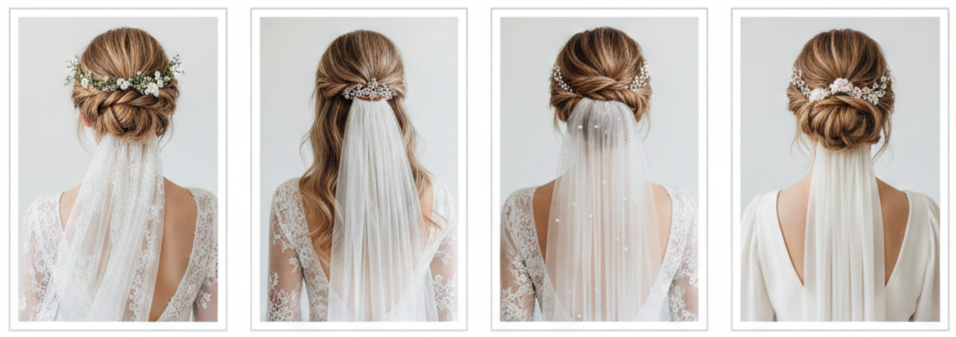
Best Pairings with Veils
Many half-up styles work well with lighter veils, especially when the veil comb anchors into the secured section rather than loose hair.
Letting It All Down—The Loose Hair Look
Wearing your hair down can look stunning in a garden setting, especially when it’s styled with intention and protected against outdoor challenges. The goal is to keep the look soft and natural while avoiding the “lost shape” effect after a few hours outside.
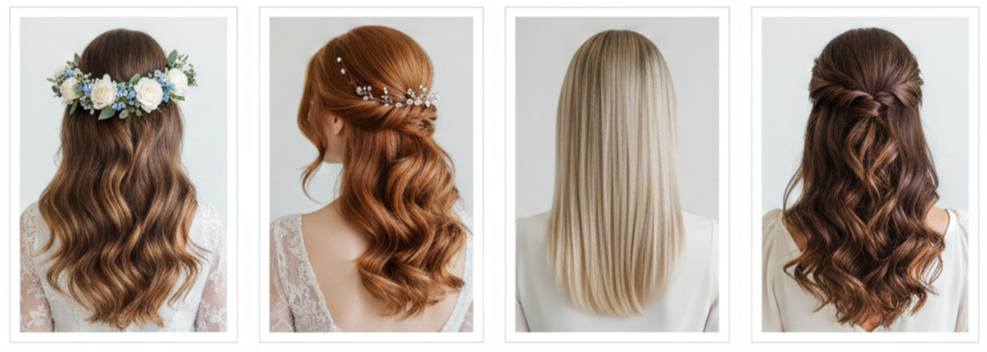
- Beachy Waves with a Flower Crown: This look feels romantic and carefree, and it pairs well with flowy dresses and soft makeup. A well-fitted flower crown can also help keep hair in place and add instant garden charm.
- Side-Swept Curls with Jeweled Pins: Side-swept curls feel elegant and look amazing in photos, especially when pinned with pearls or crystals for a subtle shine. This style keeps one side controlled while still giving movement.
- Straight and Sleek with Soft Layers: A polished straight style can be striking and modern while still fitting the garden vibe. We keep it smooth with lightweight finishing products so it doesn’t look stiff.
- Down Styles with Hidden Anchors: Small, concealed pinning at the sides or crown can help a down style last longer. This keeps the look natural while improving hold.
Braided Hairstyles That Feel Whimsical
Braids feel right at home in a garden wedding. They look romantic, hold their shape well, and give you a styled look that still feels natural. Braids also photograph beautifully against greenery and floral backdrops.
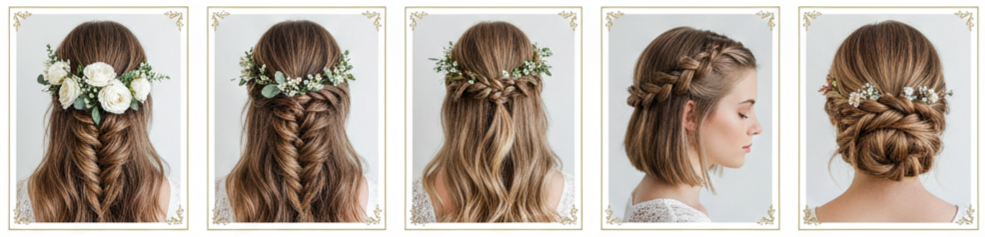
- Fishtail Braid with Floral Details: A fishtail braid has a textured, romantic finish that fits garden weddings perfectly. We can weave in delicate blooms or tuck them into the braid’s curves for a natural touch.
- Milkmaid Braid with Greenery: A milkmaid braid wraps around the head and creates a vintage, storybook look. It’s especially lovely for outdoor ceremonies because it stays secure and keeps hair off your face.
- Waterfall Braid with Loose Waves: A waterfall braid adds detail without taking over the whole hairstyle. It’s ideal when you want a soft, flowing look with a little extra interest.
- Braids for All Hair Lengths: Shorter hair can still include braided accents, while longer hair can handle fuller braid designs. We adjust thickness, placement, and fullness to suit your length.
- Braids That Last Outdoors: Braids usually resist wind better than fully loose styles, which makes them a practical choice for open gardens.
Hair Ideas for Bridesmaids and Flower Girls
A garden wedding looks even more cohesive when bridesmaids and flower girls have hairstyles that match the mood. We aim for coordination without looking overly identical, so each person still looks like themselves.
- Bridesmaids with Braided Low Ponytails: A braided ponytail looks polished yet relaxed, and it works across many hair types. Adding a soft ribbon or small floral clip can tie it into the wedding palette.
- Bridesmaids with Half-Up Braids: A half-up braid style looks romantic and keeps hair controlled for photos and movement. It pairs well with dresses that have straps, sleeves, or open backs.
- Bridesmaids with Twisted Side Buns: A side bun feels elegant and holds well outdoors. It’s a strong choice for warm weather and long wear time.
- Flower Girls with Loose Curls and Mini Crowns: Loose curls with a small flower crown feel classic for garden ceremonies. The look stays sweet, simple, and photo-ready.
- Flower Girls with a Single Braid Accent: A simple braid keeps hair neat while still looking soft. Clips like tiny flowers or butterfly pins can add a playful touch without being too busy.
Accessories That Work with the Garden Theme
Accessories can turn a beautiful hairstyle into a complete bridal look. Garden weddings are the perfect excuse to include florals, greenery, and soft, romantic details, as long as everything feels secure and comfortable.
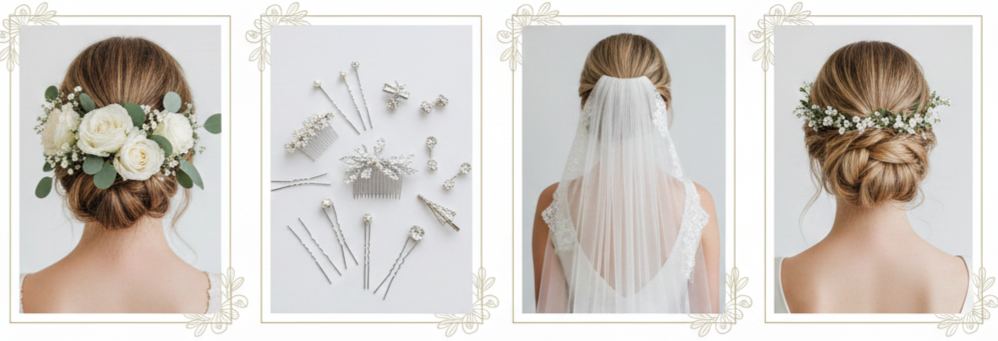
- Fresh Flowers vs. Faux Florals: Fresh flowers look natural and match the venue perfectly, yet they may wilt in heat. Faux florals, especially silk or preserved blooms, last longer and often feel lighter.
- Hair Combs, Pins, and Clips: Pearl pins, crystal clips, and metal combs add gentle sparkle that looks great in sunlight. These pieces also support the hairstyle by locking sections into place.
- Veils That Fit Outdoor Settings: Lightweight veils tend to behave better outdoors. We place the veil where it anchors into the style, so it doesn’t slide during movement or photos.
- Headbands and Floral Vines: Floral vines and thin headbands blend beautifully into braided or half-up styles. They can also help control flyaways and add shape around the crown.
- Trialing Accessories Ahead of Time: The best way to avoid surprise slipping is to test accessories during your hair trial, especially if you plan to use both florals and a veil.
Tips for Keeping Your Hair Perfect All Day
Outdoor weddings can be unpredictable, so we focus on prep, product choices, and a realistic plan for touch-ups. A garden wedding hairstyle should look soft and natural, yet it also needs enough structure to last through the full day.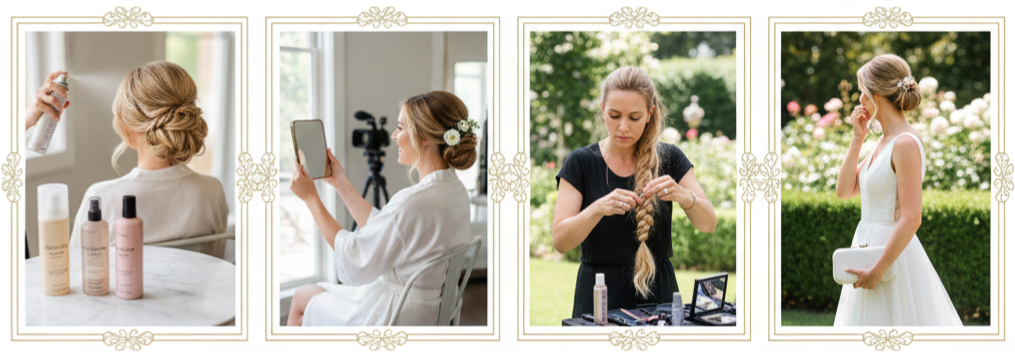
- Product Prep That Matches the Weather: We use humidity-resistant and flexible-hold products so the hair stays styled without feeling crunchy. The right prep makes a bigger difference than constant touch-ups.
- A Trial That Mimics Your Wedding Day: A hair trial gives you a chance to see how the style feels, how it looks in photos, and how it holds after a few hours. It also helps you decide whether you want more structure or more softness.
- A Stylist Who Understands Outdoor Wear: Outdoor styling requires smart pinning, controlled volume, and finish products that handle wind and heat. Experience matters when the setting is open-air.
- A Simple Touch-Up Plan: A few quick fixes can keep the style looking fresh. We keep the plan simple so it doesn’t interrupt your day.
Steps: A Quick Garden-Wedding Hair Survival Plan
- Pack bobby pins, a mini hairspray, and a small comb for quick fixes.
- Assign one person to carry the kit so it stays accessible during photos.
- Schedule a short touch-up window after portraits and before the ceremony starts.
- Use blotting sheets and light powder around the hairline to reduce shine in bright sunlight.
- Keep accessories secured with extra pins, especially veils and crowns.
Conclusion
Garden wedding hairstyles look best when they feel natural, last comfortably, and match the outdoor setting without fighting it. We get the best results by choosing a style that works with your hair type, pairs well with your dress and accessories, and accounts for wind, warmth, and humidity. Whether you choose a romantic updo, a half-up style, loose waves, or a braid-forward look, the goal stays the same: a hairstyle that looks soft, stays secure, and feels like you from start to finish.
Key Takeaway: The best garden wedding hairstyle blends beauty and wearability—soft enough to match the setting, structured enough to hold up outdoors.
FAQs
What’s the best way to keep curls from falling flat during an outdoor ceremony?
Use a curl-setting spray, let curls cool before brushing, and apply a light-hold finishing spray to lock them in place.
Can we wear a veil and a flower crown together without it feeling bulky?
Yes, just place the veil underneath the flower crown and secure both with pins to keep them stable and comfortable.
Is it okay to use real flowers in hair for a long outdoor wedding day?
Yes, but choose flowers that hold up well in heat or consider preserved flowers for all-day freshness.
How should we prep hair the day before so styling goes smoothly?
Wash your hair the day before, avoid heavy products near the roots, and sleep with hair loosely tied to minimize tangles.
Should we plan a backup hairstyle in case the weather changes?
Yes, always have a backup plan with your stylist in case of wind or rain to ensure the look stays secure.
Garden Wedding And Wedding Invitations Inspirations
| Theme | Color Palette | Key Décor Elements | Invitation Style |
| Rustic Elegance | Earth tones, greens | Wood, burlap, string lights | Kraft paper, serif fonts |
| Boho Chic | Neutrals, dusty rose | Macramé, dried florals | Minimalist, textured paper |
| Vintage Garden Party | Pastels, ivory | Lace, antiques, tea sets | Floral borders, script fonts |
| Modern Minimalist | White, black, sage | Clean lines, simple florals | Monochrome, sans-serif fonts |
| Fairy Tale Whimsy | Soft pink, gold | Lanterns, fairy lights | Watercolor art, gold foil |
Why Choose a Garden Wedding
A garden wedding feels warm, romantic, and naturally stylish without needing a ton of extra décor. The setting already brings color, texture, and atmosphere through flowers, trees, and open sky, so the entire day can feel elevated from the start.
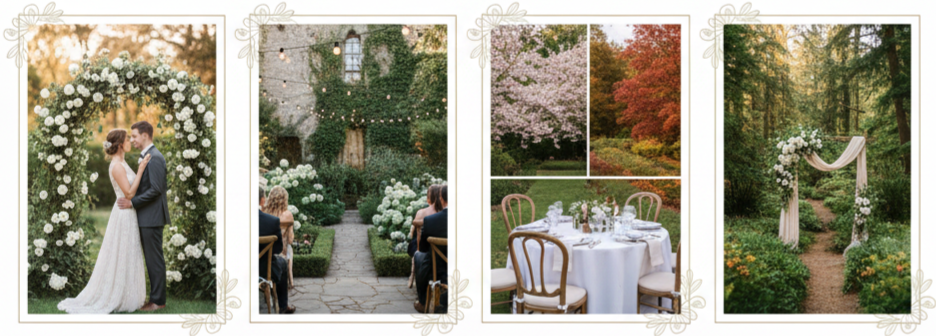
- Natural Atmosphere: A garden setting brings greenery, florals, and soft outdoor light that instantly creates a calm and romantic mood.
- Built-In Backgrounds: From ceremony photos to reception shots, gardens offer ready-made backdrops that look polished with minimal styling.
- Flexible Styles: Gardens work with formal, casual, modern, vintage, and whimsical looks, so you can shape the vibe without fighting the venue.
- Seasonal Personality: Spring feels fresh and floral, summer feels bright and full, and fall brings richer tones that still look stunning outdoors.
- Simpler Décor Planning: When the venue already looks beautiful, you can focus your budget on a few statement pieces instead of covering every corner.
Garden Wedding Themes to Inspire You
Picking a theme makes planning easier because it gives you a clear direction for florals, tablescapes, colors, attire, signage, and wedding invitations. A garden wedding supports many styles, so the key is choosing one that matches the mood you want guests to feel.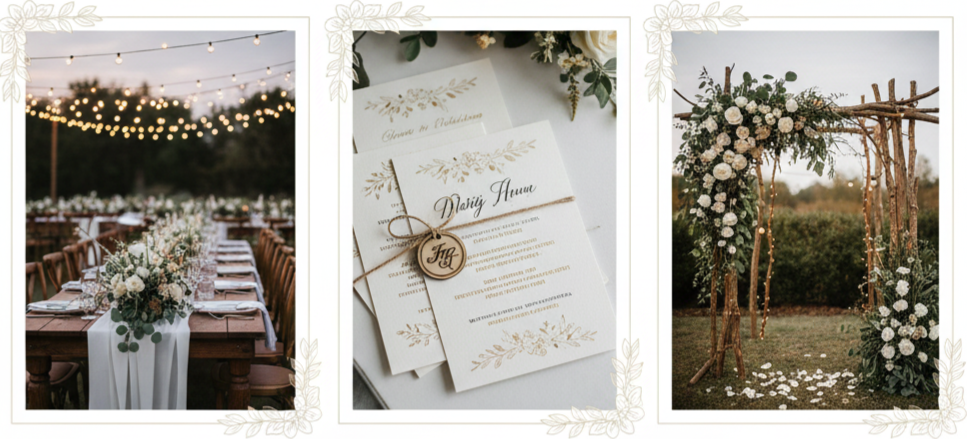
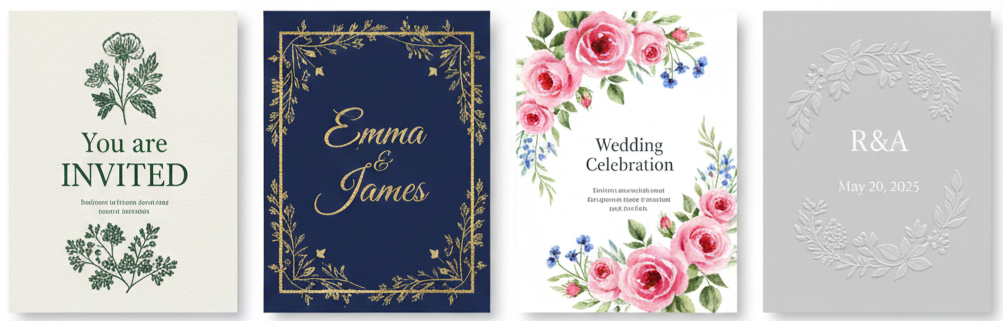
Rustic Elegance
Wood accents, soft string lighting, and natural florals create a relaxed look that still feels refined, especially with neutral tones and textured details.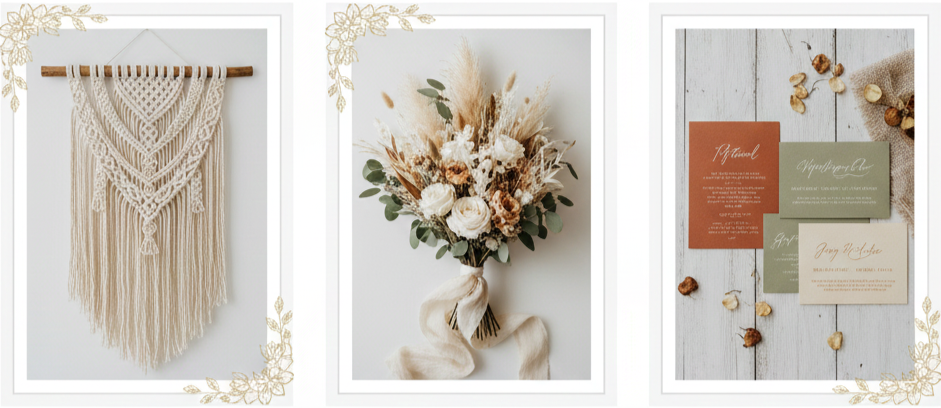
Boho Chic
Macramé, dried florals, airy fabrics, and earthy colors create a free-spirited feel that fits perfectly in outdoor spaces.
Vintage Garden Party
Lace-inspired details, pastel palettes, and classic touches like antique-style décor create a timeless, romantic garden vibe.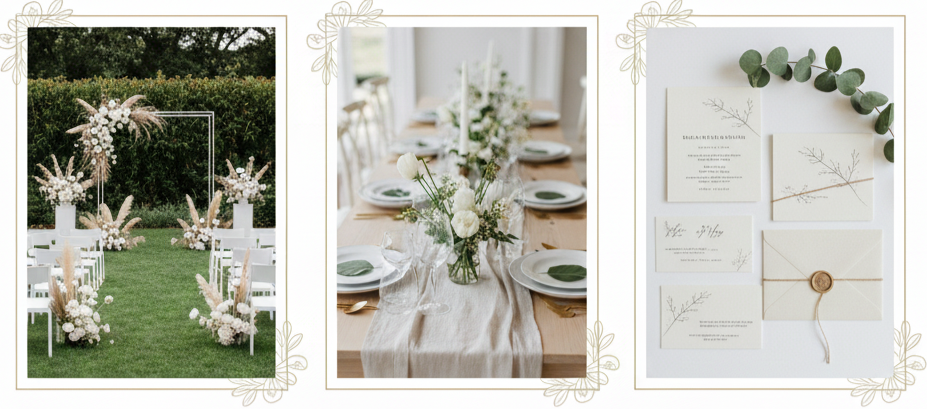
Modern Minimalist
Clean lines, neutral tones, crisp layouts, and intentional floral choices give a garden wedding a sleek, contemporary feel.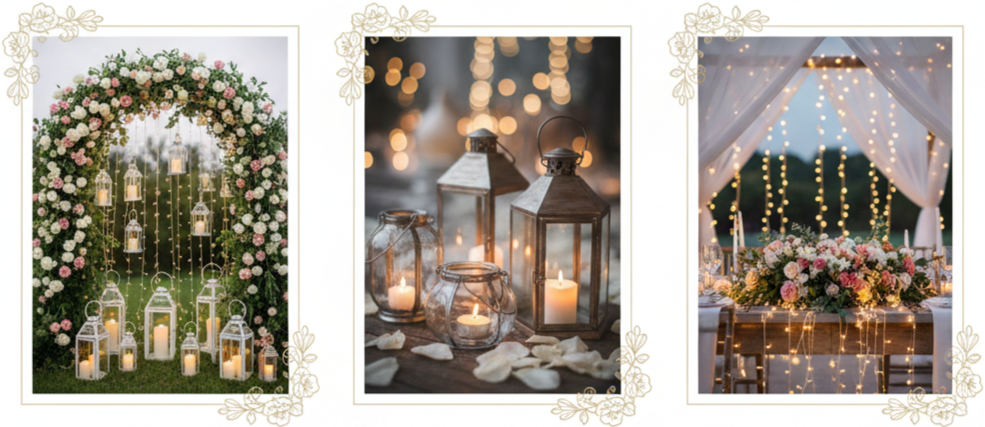
Fairy Tale Whimsy
Lanterns, twinkle lights, floral arches, and dreamy styling bring a magical mood that feels like an outdoor storybook scene.
Designing the Perfect Garden Wedding Invitations
Your invitations shape the first impression. Before guests see the venue, the flowers, or your outfit, they experience your wedding through the paper, the design, and the details you include. Garden wedding invitations work best when they feel light, natural, and connected to the outdoor setting.
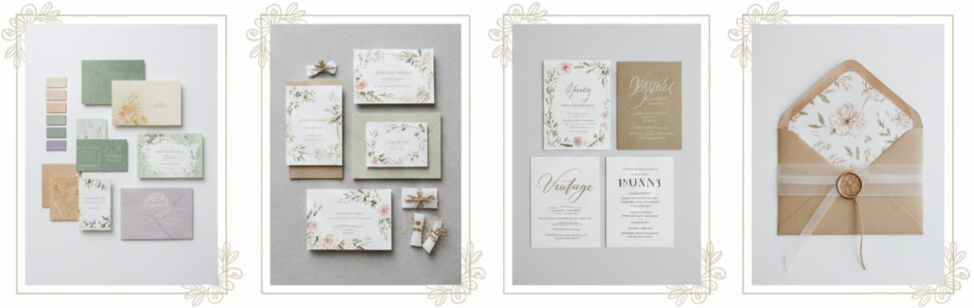
- Color Schemes: Soft greens, blush tones, ivory, warm neutrals, lavender accents, and muted floral shades feel natural in a garden setting and photograph beautifully.
- Floral Illustrations: Watercolor blooms, botanical line art, leafy borders, and floral frames instantly communicate a garden theme while keeping the invitation elegant.
- Eco-Friendly Materials: Recycled paper, plantable seed paper, and responsibly sourced cardstock fit a garden vibe while keeping the suite more sustainable.
- Typography Choices: Romantic scripts work well for formal garden celebrations, vintage serif fonts match classic themes, and clean sans-serif fonts support modern garden styles.
- Envelope Styling: Wax seals, vellum wraps, floral liners, ribbon ties, and twine details add texture and make the invitation feel like an experience, not just a card.
How to Match Your Invitations with Your Garden Venue
Invitations look best when they reflect the venue’s personality. A backyard garden celebration feels different from a formal botanical venue, and your stationery can hint at that difference in a subtle, stylish way. When the invitation matches the setting, guests understand the vibe right away.
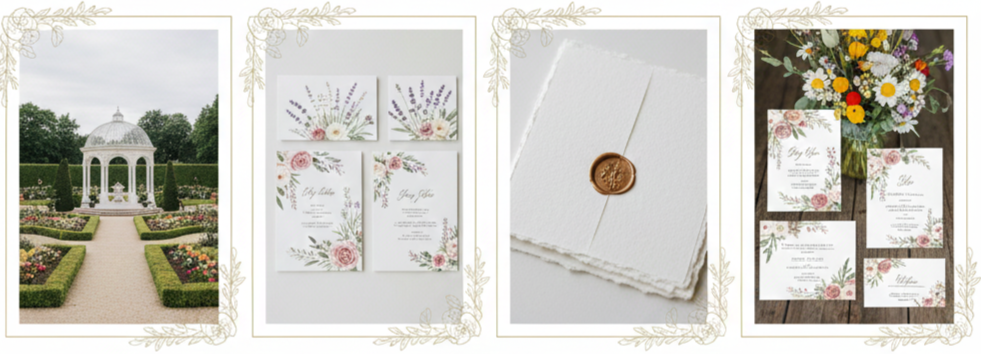
- Venue Mood: Formal gardens pair well with crisp layouts, refined fonts, and premium paper finishes, while casual outdoor spaces suit softer designs, natural textures, and relaxed typography.
- Florals in the Space: When the venue features signature flowers or recognizable greenery, you can include similar elements in the illustration style so the design feels connected to the location.
- Paper Texture: Smooth cardstock supports modern, minimalist looks, while textured, handmade, or deckled-edge paper fits rustic, vintage, or whimsical garden themes.
- Design Consistency: When your invitation style matches your décor style, everything feels intentional, from the first envelope to the ceremony backdrop.
Creative Add-Ons and Stationery Ideas
A strong invitation suite goes beyond the main invite. These extra pieces keep guests informed, reinforce your theme, and make the experience feel more complete. You can keep it simple or build a full set, depending on what your wedding needs.
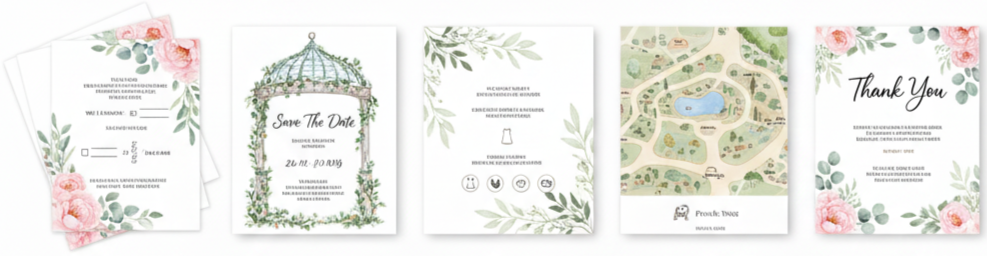
- RSVP Cards: Matching floral accents, simple layouts, and a clear response format keep things easy for guests while maintaining a cohesive look.
- Save-The-Dates: A garden-inspired save-the-date sets the tone early, especially when it includes botanical elements, soft colors, or a venue-style illustration.
- Details Cards: Outdoor weddings run smoother when guests receive clear notes about attire, terrain, timing, and weather expectations in a dedicated insert.
- Custom Maps: A charming map insert works well for large garden venues, private estates, or locations with multiple entry points and parking areas.
- Thank-You Cards: Using the same fonts, colors, and floral style creates a clean finish and ties your entire stationery set together.
When and How to Send Garden Wedding Invitations
Outdoor weddings benefit from clear timing and clear communication. Guests need enough notice to plan travel, prepare outfits that work outdoors, and understand how the day will flow. A simple mailing timeline keeps things organized.
- Send Save-The-Dates: Aim for 6 to 8 months ahead, especially for peak seasons, destination travel, or popular garden venues.
- Mail Invitations: Aim for 8 to 10 weeks before the wedding so guests have time to plan and respond without rushing.
- Set RSVP Deadlines: Choose a deadline that gives you enough buffer time for catering counts, seating charts, and rentals.
- Add Outdoor Notes: Include helpful guidance about footwear, sun exposure, cooler evening temperatures, or walking paths so guests arrive prepared.
Where to Get Garden-Themed Wedding Invitations
Where you source your invitations depends on how custom you want the design to feel. Some couples want quick customization with a polished template, while others want a fully original suite with venue sketches and custom florals.
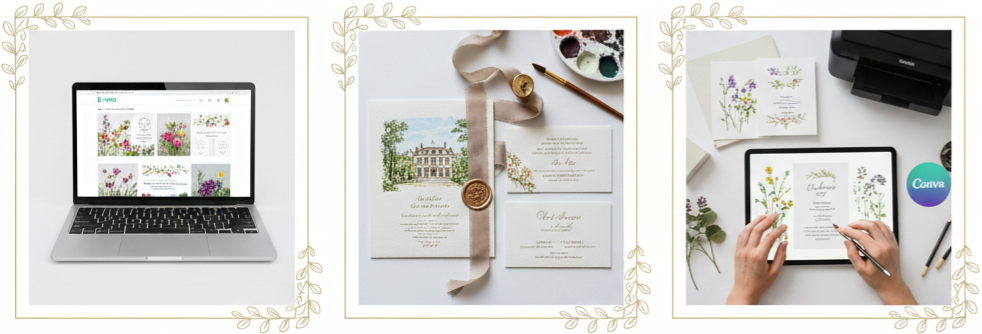
- Online Platforms: Sites like Minted, Etsy, and Zazzle offer a wide range of garden-inspired designs, plus matching pieces like RSVP cards, details inserts, and thank-you notes.
- Custom Stationers: A custom designer can match your real florals, sketch your venue, and create a unique look that feels personal and one-of-a-kind.
- DIY Tools: Canva and Adobe Express make it easy to build a botanical invitation style with templates, and you can print locally or through an eco-focused printer for better paper options.
Conclusion
A garden wedding already brings natural beauty, so the smartest approach is letting that setting shape your design choices. When your invitations echo the outdoor atmosphere through color, florals, typography, and materials, the entire celebration feels more connected and intentional. From the first envelope your guests open to the final thank-you card they receive, a cohesive garden-inspired stationery style keeps your wedding vision consistent and memorable.
Key Takeaway: Garden weddings look and feel best when the invitation design reflects the venue’s natural style, from botanical details and color choices to paper texture and envelope presentation.
FAQs
What wording works best for a garden wedding invitation tone?
Keep it light, romantic, and clear by using warm phrasing that matches the outdoor vibe, while keeping the logistics easy to read on a separate details card.
What invitation details matter most for an outdoor venue?
Terrain notes, timing clarity, parking instructions, and weather-friendly guidance keep guests comfortable and reduce day-of confusion.
What paper finish looks best with botanical designs?
Textured cotton or linen stock makes floral art feel more premium, while smooth cardstock keeps modern botanical layouts crisp and clean.
What’s a simple way to make invitations feel more garden-inspired?
Add a botanical border, leaf motifs, or floral line art, then match the envelope liner or wax seal color to your wedding palette.
What’s a smart way to keep the suite organized without clutter?
Use a clean main invitation, then place attire, directions, and outdoor notes on a single details card so everything stays polished.
Garden Wedding
Blog post imported from: https://www.invitesweddings.com/b/garden-wedding
Fuschia And Black Wedding Theme
| Role | Outfit Colors | Accent Details |
| Bride | White or Blush Gown | Fuschia bouquet, black sash/shoes |
| Groom | Black Suit or Tux | Fuschia tie, boutonniere, socks |
| Bridesmaids | Fuschia Dresses | Black sashes, shoes, or jewelry |
| Groomsmen | Black Suits | Fuschia ties, pocket squares |
The Power of the Fuschia and Black Color Palette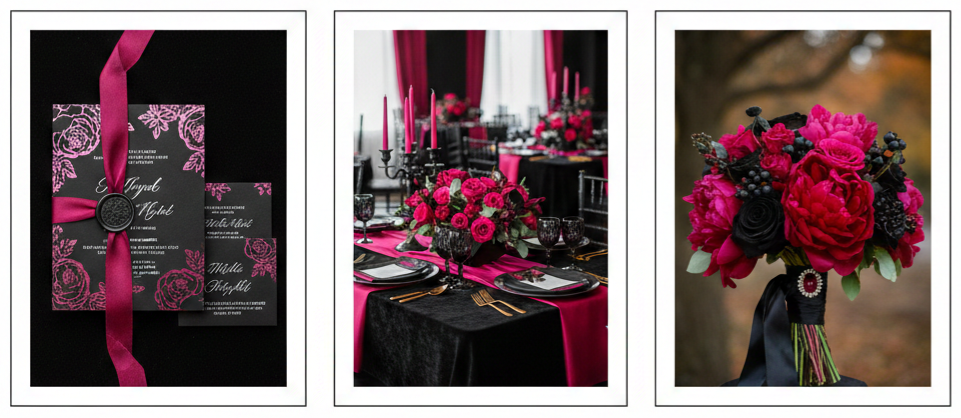
- Why it works: Fuschia and black are a show-stopping pair. Fuschia brings brightness and intensity, while black keeps things grounded and elegant. Together, they create a contrast that’s striking yet balanced. It’s a palette that feels modern and romantic all at once.
- Best seasons: Fall and winter are ideal for this theme. The cooler months naturally complement the deeper tones of black, and the bold pop of fuschia brings in a much-needed spark. That said, it can still look amazing in any season with the right lighting and decor choices.
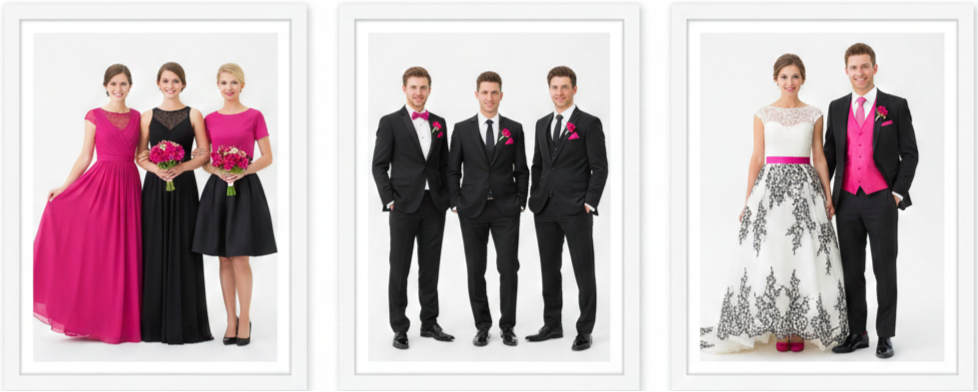
Bridal and Groom Attire in Fuschia and Black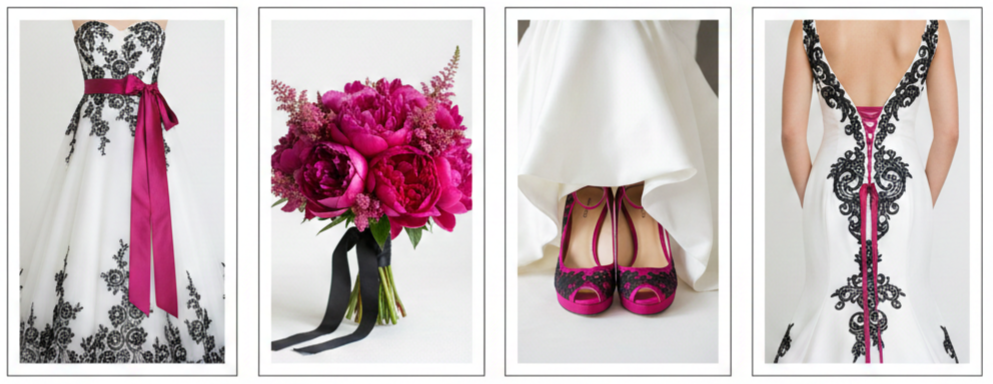
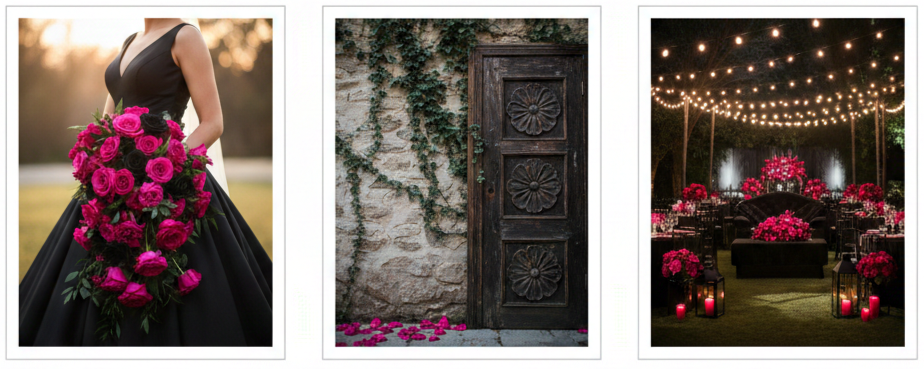
Bride
A white gown looks stunning when styled with fuschia accents. You could carry a bouquet filled with fuschia peonies, wear shoes that pop beneath your dress, or tie a satin sash around your waist. If you’re feeling bold, add black lace or embroidery details to your gown.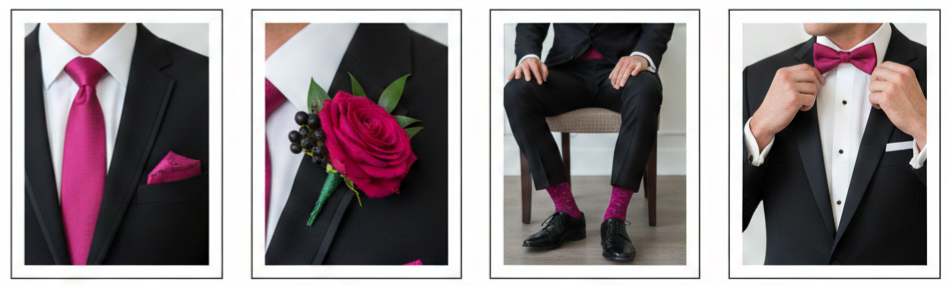
Groom
A classic black tux or suit never fails. Use fuschia touches like a tie, pocket square, boutonniere, or even patterned socks to keep things fun and in sync with the theme.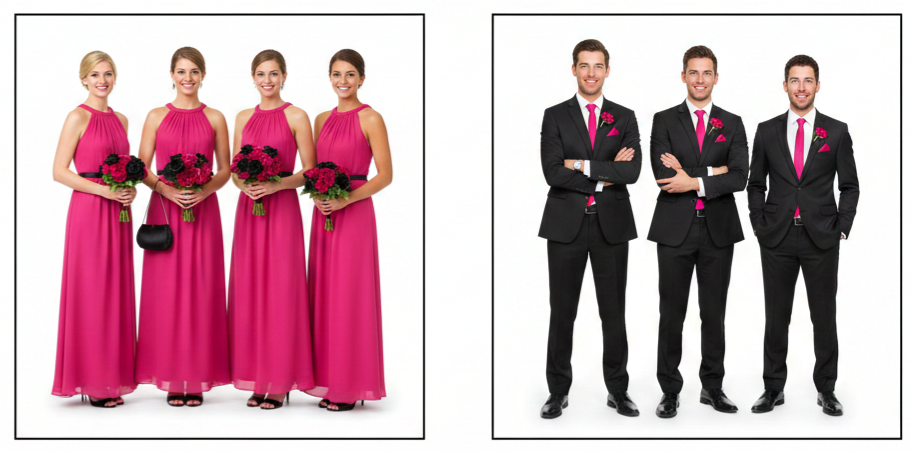
Bridal party
Bridesmaids in fuschia dresses paired with black accessories bring everything together. Groomsmen in black suits and fuschia ties will match the tone perfectly.
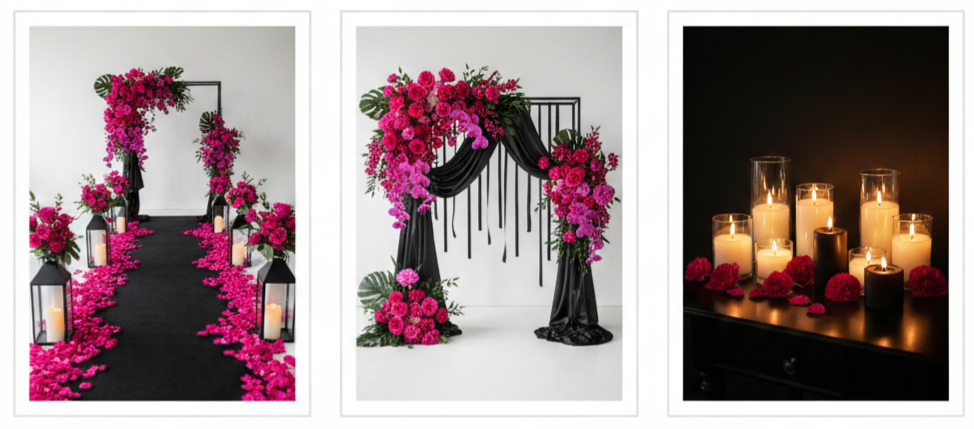
Striking Ceremony Décor Ideas
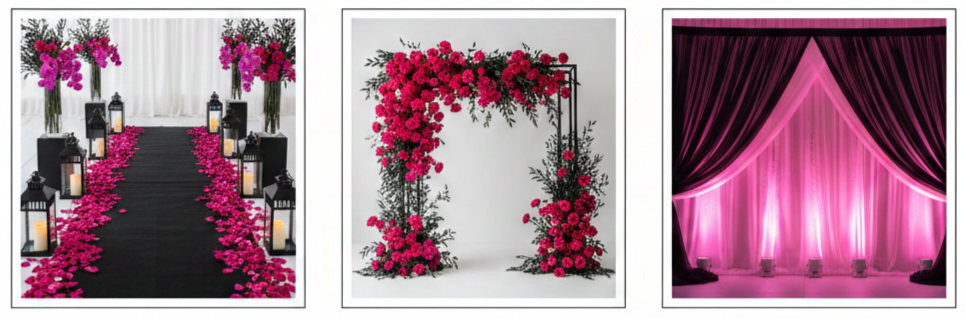
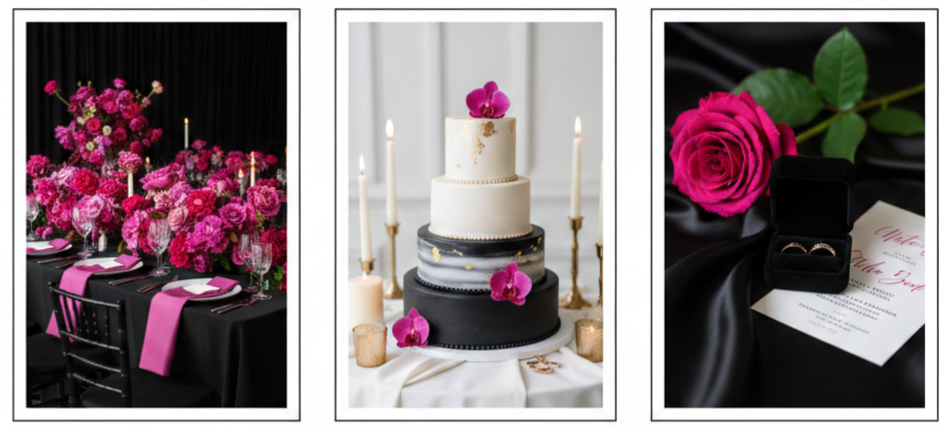
- Aisle setup: A black runner lined with fuschia petals immediately grabs attention. Add lanterns, candles, or floral arrangements along the sides to elevate the space.
- Floral arch: Use a mix of bright fuschia flowers with deep green or black accents. Mount them on a sleek black frame or iron arch to tie everything in.
- Backdrop and lighting: Drapes in black or sheer pink, paired with soft uplighting, make the entire ceremony feel dramatic and intimate without being overwhelming.
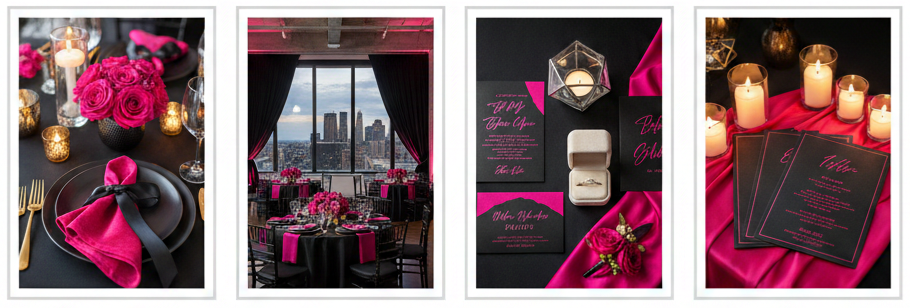
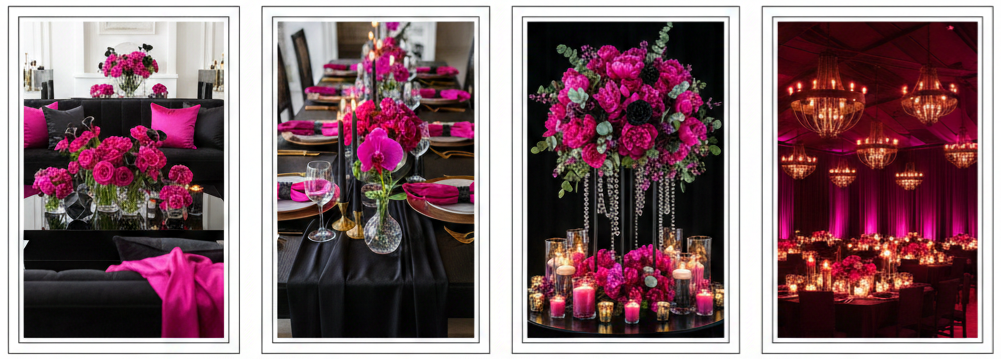
Reception Styling With Modern Glamour

- Table styling: Black tablecloths provide a bold base. Layer in fuschia napkins, shimmering charger plates, and elegant centerpieces to build dimension. Gold or silver details can add an upscale finish.
- Centerpieces: Go for height and volume with black vases filled with lush fuschia flowers. You can add candles or feathers for extra flair.
- Decor accents: Chiavari chairs in black with fuschia sashes, ceiling drapes in pinks or blacks, and a floral tunnel at the entrance can all add polish and wow factor to your reception.
Elegant Invitations and Stationery Design
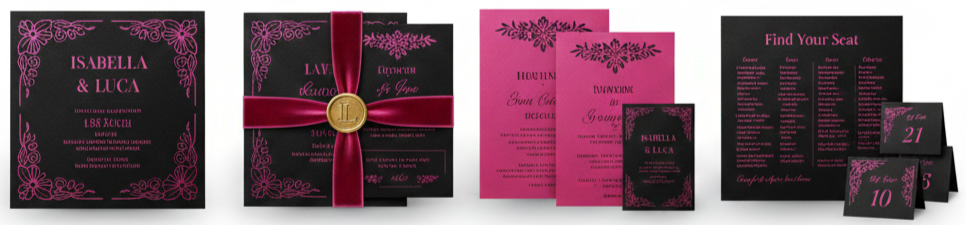
- Design ideas: Black invitations with fuschia text or vice versa look stylish and bold. Embossed details, foil accents, and velvet finishes give them a high-end feel.
- Matching pieces: Keep everything aligned—from ceremony programs to table menus and seating charts. Consistent fonts, colors, and textures help guests feel the theme from start to finish.
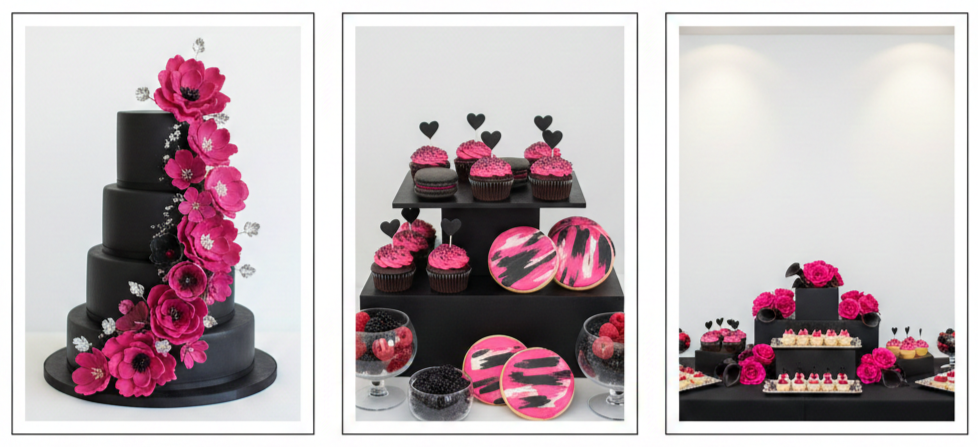
Wedding Cake and Catering Presentation

- Cake ideas: A matte black cake decorated with cascading fuschia blooms is both dramatic and sophisticated. Add edible metallics like gold leaf for a luxe effect.
- Dessert table: Incorporate fuschia and black macarons, cake pops, or candies. Use black trays and tiered stands to display them in style.
- Cocktails and food styling: Serve custom drinks in fuschia tones using hibiscus or dragon fruit. Present dishes on black plates for a rich, themed look that feels cohesive.
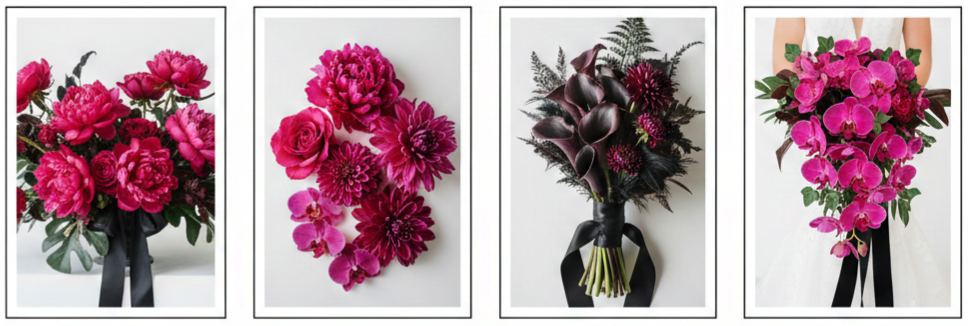
Floral Arrangements That Command Attention
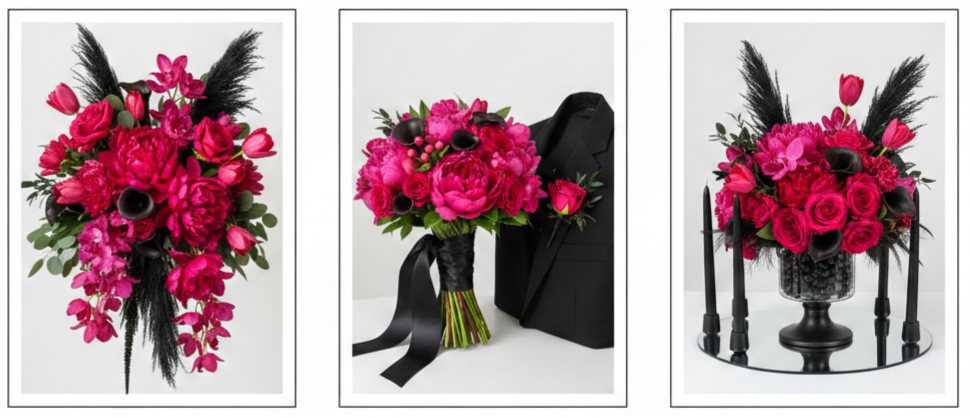
- Flower choices: Fuschia peonies, orchids, tulips, and roses make a bold statement. Combine them with darker elements like black calla lilies, deep greenery, or dyed pampas grass.
- Bouquets and boutonnieres: Brides can carry full, round bouquets wrapped in black satin ribbon. Grooms and groomsmen can wear boutonnières with small, bold blooms that tie into the overall floral theme.
- Centerpieces and extras: Use black stands, matte vases, or clear containers with black stones or feathers. Accent with candles or mirrors to bounce light and create drama.
Photography and Visual Styling
- Backdrop selection: Look for natural, neutral backgrounds like stone walls, wood textures, or greenery. These will help the theme colors pop without distraction.
- Lighting tips: Golden hour offers beautiful warmth that enhances fuschia tones. At night, use string lights, lanterns, and soft spotlights to make both fuschia and black stand out.
- Props and styling: Velvet chairs, oversized bouquets, and floral backdrops can give your portraits a polished, editorial-style finish that keeps everything on-theme.
Balancing the Palette for Elegance
- Use black as your base: Let black anchor the big items—tablecloths, chairs, backdrops. Then use fuschia to highlight the most eye-catching pieces like florals, napkins, and key accessories.
- Incorporate neutral tones: Whites, creams, champagne, or metallics break up the intensity of black and fuschia. This keeps the overall look balanced and helps prevent visual fatigue.
- Keep it simple: You don’t need to use both colors everywhere. The key is placement. A few intentional pops of fuschia go a long way when set against a sophisticated black background.
Conclusion
A fuschia and black wedding theme isn’t for the faint of heart—and that’s exactly what makes it unforgettable. From the outfits and flowers to the decor and photos, this theme gives every detail a fresh, dramatic twist. It’s ideal for couples who want their celebration to reflect bold style, deep love, and a little bit of flair.
Key Takeaway: Fuschia and black are a powerful pair that can turn any wedding into a stylish, modern, and unforgettable celebration filled with bold color and elegant contrast.
FAQs
Can I still use a fuschia and black theme for a spring or summer wedding?
Yes, you definitely can. Just stick to lighter fabrics, brighter fuschia tones, and add softer touches like sheer drapes or airy florals to keep the look fresh and seasonally appropriate.
How do I incorporate the theme into my wedding favors?
Use custom packaging—like black boxes tied with fuschia ribbons or fuschia tags on black jars. Mini candles, candies, or handmade items in these colors make memorable and stylish favors.
What kind of venue fits this theme best?
Elegant ballrooms, industrial lofts, or historic buildings all complement this bold theme. Neutral-toned venues with adjustable lighting make it easier to showcase both fuschia and black without clashing with the surroundings.
Can I mix in other colors without ruining the look?
Absolutely. Metallics like gold or silver pair beautifully, and soft tones like blush, ivory, or cream can add a gentle touch that keeps the bold theme balanced and romantic.
How do I avoid the theme looking too dark or gothic?
The trick is to add soft lighting, lots of florals, and personal touches. Romantic candlelight, sheer fabrics, and textured details will soften the look and make it feel more elegant than edgy.
Fuchsia And Black Wedding Ideas
Blog post imported from: https://www.invitesweddings.com/b/fuchsia-and-black-wedding-ideas
Fuchsia And Black Wedding
| Accent Color | Effect | Best Use |
| Gold | Glamorous and warm | Tableware, décor accents, signage |
| Silver | Sleek and modern | Stationery, lighting, flatware |
| White | Clean and classic contrast | Florals, draping, candles |
| Cream | Softens bold tones | Linens, bridal attire, backdrops |
| Deep Plum | Adds richness and depth | Bouquets, centerpieces, lighting |
| Blush Pink | Romantic and subtle | Bridesmaid dresses, cake details |
Creating the Mood with Fuchsia and Black
A fuchsia and black wedding delivers instant contrast, and that contrast is exactly what makes it feel modern, stylish, and unforgettable. Fuchsia brings bright, lively energy, while black adds depth and polish. Together, they create a look that feels confident without feeling messy or chaotic.
This palette tends to shine in the evening, especially in indoor venues where lighting can add mood and drama. It also fits beautifully with fall and winter dates because the darker shade feels seasonally natural, while the fuchsia keeps everything from looking too heavy. For spring or summer weddings, the color pair still works, you just want to be a little more intentional with balance so the black reads as elegant rather than intense.
- Best Seasons And Settings: Evening receptions, indoor ballrooms, modern lofts, art galleries, city rooftops, fall weddings, and winter celebrations.
- Accent Colors To Consider: Gold for a glam feel, silver for a crisp modern finish, white or cream to soften contrast, deep berry or plum tones to add richness without clashing.
- Texture Matters: Velvet, satin, matte paper, glossy signage, and candlelight help the palette feel layered instead of flat.
Fuchsia and Black Wedding Invitations
Invitations are where we start showing guests what kind of wedding they’re walking into. With fuchsia and black, it’s easy to make the first impression feel elevated. Black gives the design structure, while fuchsia delivers that “wow” factor, even in small touches.
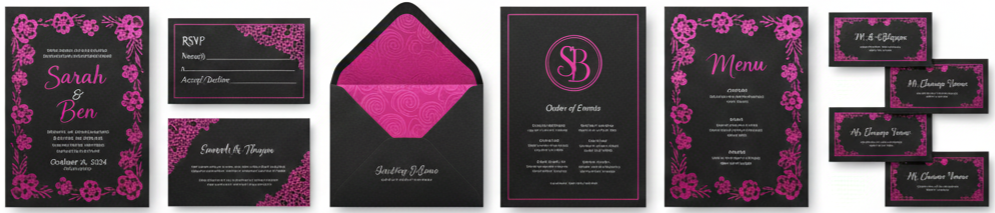
- Paper And Print Style: Matte black cardstock looks sleek and upscale, especially paired with fuchsia foil stamping or letterpress details that add texture.
- Design Directions: Floral borders for romance, lace-inspired patterns for softness, modern typography for a clean look, or a monogram for a tailored vibe.
- Envelope Details: Black envelopes with fuchsia liners feel dramatic in a good way, and white or metallic ink keeps everything readable and polished.
We also like keeping the invitation design consistent with day-of paper items, like menus and place cards, so the theme feels intentional from start to finish.
Ceremony Decor with Bold Elegance
For the ceremony, we can go subtle or dramatic without losing the theme. The key is choosing one “hero” moment, like a floral arch or aisle styling, then supporting it with smaller matching details. That approach keeps the look cohesive without overwhelming the space.
- Aisle Styling: A black aisle runner paired with fuchsia petals creates instant contrast. Another option is lining the aisle with black lanterns and adding fuchsia florals at intervals.
- Altar or Arch Focus: A floral arch featuring fuchsia orchids, roses, and peonies looks lush and romantic. Adding black draping, black ribbon, or dark foliage builds depth without making it feel too heavy.
- Mood Lighting: Candlelight is a natural match for this palette. Soft, warm lighting makes black look rich instead of harsh, and it helps fuchsia glow in photos.
We also recommend thinking about what’s behind you during vows. A simple background can make fuchsia florals pop, while a detailed background may call for more streamlined flowers so the scene doesn’t feel busy.
Reception Styling and Table Settings
The reception is where this palette really gets to show off. Black tablescapes feel sleek and dramatic, while fuchsia adds celebration energy. What makes it look high-end is how we layer materials: fabric, glass, florals, candlelight, and metallic accents.
- Table Foundation: Black velvet or matte linens create a strong base. Fuchsia napkins or runners add color without taking over.
- Centerpiece Ideas: Use black vases filled with fuchsia blooms for a clean look, or mix tall and low arrangements for dimension. Floating candles, metallic votives, and clear glass cylinders can add glow and depth.
- Place Setting Details: Black chargers, gold or silver flatware, clear glassware, and a fuchsia accent such as a folded napkin, name card, or menu tie the look together.
- Lighting Strategy: Pink or purple uplighting enhances fuchsia tones. Black chandeliers or hanging lanterns add drama. String lights soften the overall feel and keep the room from looking too dark.
If we want the palette to feel more romantic than edgy, we add more candlelight and softer textures. If we want it to feel more modern, we lean into clean lines, glossy black accents, and minimalistic floral shapes.
Bridal Party Attire That Pops
This color scheme gives the wedding party a polished look with plenty of ways to personalize. The best approach is choosing one dominant look, then using the other color as an accent. That keeps photos clean and coordinated.
- Bridesmaid Options: Fuchsia dresses create a bold, cohesive look against black décor. Black dresses with fuchsia bouquets feel sleek and timeless. A mix-and-match lineup using both colors also works, especially when the fabrics match.
- Groomsmen Styling: Black suits or tuxedos stay classic, while fuchsia ties, pocket squares, boutonnieres, or socks add a sharp pop of color.
- Bride And Groom Touches: A white gown with black lace detail looks refined and dramatic. A fuchsia sash or fuchsia shoes add personality without taking over. For couples who want something bolder, a black gown creates a striking theme match. The groom can mirror accents with a fuchsia boutonniere or vest for a cohesive look.
The most important detail is consistency. When we keep metal tones, floral styles, and accessory choices aligned, everything looks intentional in photos.
Fuchsia and Black Wedding Cake and Desserts
Desserts are an easy place to bring in the theme because color can show up through icing, flowers, and display styling. A fuchsia and black cake can look elegant, modern, or dramatic depending on the finish.
- Cake Design Ideas: Matte black icing with fuchsia sugar flowers feels bold and upscale. An ombre cake fading from fuchsia to black creates a modern gradient effect. White detailing, metallic accents, or delicate piping can soften the look while keeping it polished.
- Dessert Table Styling: Black macarons with pink filling, cupcakes topped with edible shimmer, sugar cookies with black-and-fuchsia designs, and berry-forward desserts fit the palette naturally.
- Display Details: Black risers, metallic trays, and small floral clusters around the dessert table keep the setup coordinated and photo-ready.
If we want the dessert table to feel like a centerpiece, we keep the backdrop clean and add lighting that highlights the color contrast.
Statement Floral Arrangements
Florals are the heart of this theme because fuchsia is naturally floral-friendly. Big blooms look lush, romantic, and high-impact, which pairs beautifully with sleek black décor. The goal is creating richness through shape and texture, not just piling on color.
- Best Fuchsia Blooms: Roses, peonies, orchids, dahlias, and carnations bring fullness and strong color payoff.
- Black And Dark Accents: Black ribbon wraps, dark greenery, deep-toned foliage, or subtle feather accents create depth without making arrangements feel heavy.
- Bouquet Direction: A cascading bouquet with fuchsia orchids looks dramatic and elegant. Adding dark accents or black ribbon keeps it on theme without dulling the color.
For boutonnieres and corsages, we keep it clean. One fuchsia bloom, a bit of greenery, and a black wrap can look sharp and refined.
Photography and Unique Backdrops
Fuchsia and black photograph beautifully because the contrast is strong and the colors hold up well on camera. We just want to plan the setting so the palette feels intentional instead of competing with a busy environment.
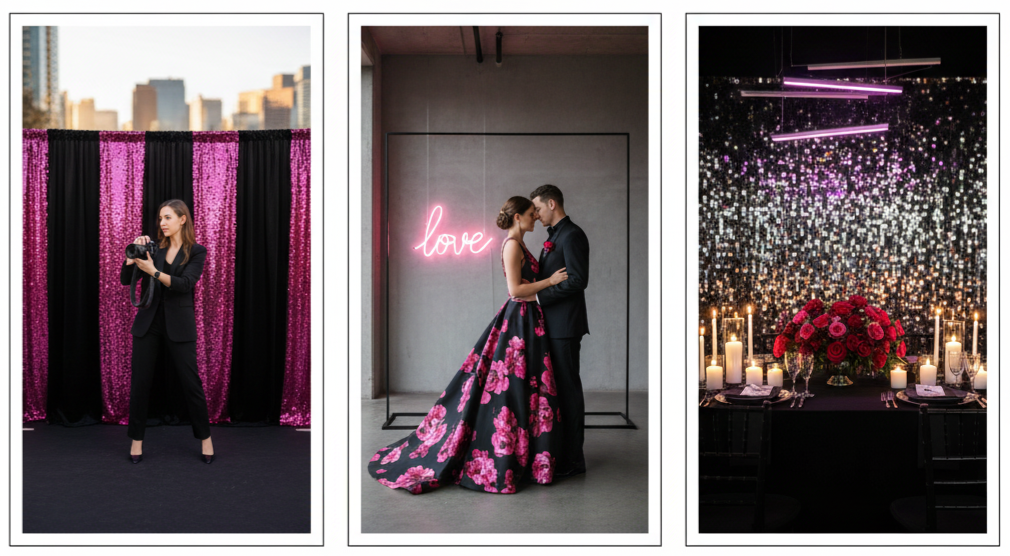
- Location Choices: Urban rooftops, industrial interiors, modern architecture, and art-forward venues work especially well. Neutral walls help the fuchsia pop.
- Backdrop Ideas: Black velvet drapes, metallic sequin walls, and modern signage with fuchsia lighting create a fun photo booth moment. A neon-style sign in pink adds personality without clutter.
- Lighting Notes: Golden hour adds warmth to skin tones while keeping fuchsia vibrant. Evening photos with soft lighting and candles bring out the depth of black and create a romantic glow.
A good photographer will also look for angles where the black elements frame the couple, while the fuchsia accents pull attention to the center of the image.
Memorable Favors and Keepsakes
Favors are a small detail, but they can feel extra special when they match the wedding design. For fuchsia and black, we like favors that look sleek, feel useful, and package well.
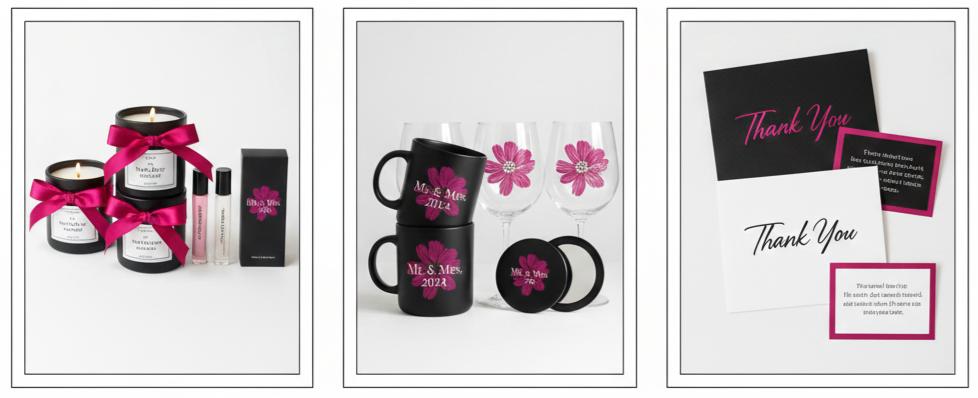
- Stylish Favor Ideas: Mini candles in black jars, perfume samples in black packaging, or small keepsake boxes tied with fuchsia ribbon.
- Practical Keepsakes: Custom mugs, stemless wine glasses, or compact mirrors printed in the theme colors.
- Thank-You Presentation: Black thank-you cards with fuchsia foil or clean white lettering look polished and intentional, especially when the typography matches the invitation suite.
We also like adding a short message card that explains the favor in one sentence. It makes the gift feel more personal without turning it into a speech.
Conclusion
A fuchsia and black wedding works best when we treat contrast as the main design feature and build everything around it with balance. Black creates structure and sophistication, while fuchsia brings the celebration energy that keeps the theme from feeling too dark. When we carry that pairing through invitations, ceremony décor, reception styling, fashion, florals, desserts, and favors, the entire day feels cohesive, intentional, and memorable without needing excessive extras.
Key Takeaway: A fuchsia and black wedding blends modern drama with polished elegance, and the most successful designs use black as the foundation while placing fuchsia in carefully chosen moments that create bold, photo-ready impact.
FAQs
What kind of lighting works best with a fuchsia and black theme?
Warm, soft lighting works best because it makes black look rich and keeps fuchsia vibrant. Candlelight, string lights, and uplighting in pink or purple tones create a flattering glow without washing out the palette.
Can we use fuchsia and black for a beach wedding?
Yes, it can work when we keep the black lighter in appearance. Use black in small accents like stationery, ribbons, or attire details, then let fuchsia florals and airy fabrics carry the theme so it still feels beach-appropriate.
What bouquet styles look best for bridesmaids in this color scheme?
All-fuchsia bouquets wrapped in black ribbon look clean and striking. A mixed bouquet using fuchsia blooms with soft blush tones and greenery adds a romantic feel while staying on theme.
Should we stick to only fuchsia and black for décor?
Not necessarily. Adding gold, silver, white, or deep berry accents can create depth and keep the theme from feeling one-note. The key is using accent colors consistently so the design stays cohesive.
How do we make the cake table match the wedding theme?
Use a black table linen as the base, then add fuchsia florals, candles, and metallic trays for dimension. A simple backdrop like black draping or a clean sign in fuchsia tones can make the display feel intentional and photo-ready.
Formal Wedding Invitations
| Item | When to Send |
| Save-the-Dates | 6–8 months before wedding |
| Save-the-Dates (Destination) | 9–12 months before wedding |
| Formal Invitations | 8–10 weeks before wedding |
| Formal Invitations (Destination) | 12+ weeks before wedding |
| RSVP Deadline | 3–4 weeks before wedding |
| Follow-Up for RSVPs | 1 week after RSVP deadline |
What Formal Wedding Invitations Are All About
Formal wedding invitations set the tone for a classic, elegant celebration. They feel timeless, they follow traditional etiquette, and they signal that guests should expect a more polished event, like a black-tie or formal evening wedding. Rather than a quick note or a casual digital message, a formal invitation suite looks intentional from the first glance and reads with the kind of wording people associate with traditional weddings.
Formal suites usually include a few pieces that work together. You’ll typically have the main invitation card, an RSVP card, and a details card. Some couples also include an inner envelope, which is a more traditional touch that clarifies exactly who is invited in each household. Every piece has a role, and when the entire suite feels consistent, guests immediately understand what kind of day you’re planning.

- Typical Invitation Suite Pieces: The main invitation, RSVP card, and details card usually form the foundation, and an inner envelope may be included for more traditional addressing.
- Overall Goal: The full suite should look coordinated, read clearly, and match the formality of the venue, ceremony style, and dress code.
What Goes Into a Formal Wedding Invitation
Formal wedding invitations follow a fairly structured layout. The top line usually introduces who is hosting, followed by a formal invitation request, then the couple’s names, and finally the date, time, and location. Formal invitations rarely use abbreviations, nicknames, or casual phrasing. Instead, they lean into full names, spelled-out dates, and wording that feels dignified.
A key part of staying formal is making sure the invitation includes everything guests need without cluttering the main card. That’s why many formal suites use insert cards for extra details, such as reception information, directions, hotel blocks, and website links. Even when you include modern details like online RSVPs, you can still present them in a way that keeps the tone refined.
- Host Line: This line identifies who is hosting the wedding, which may be the bride’s parents, both families, or the couple.
- Request Line: This is the formal invitation phrase that asks guests to attend the ceremony.
- Full Names: Formal invitations typically use full names for hosts and the couple instead of nicknames.
- Date And Time: These are traditionally spelled out instead of written in numerals and abbreviations.
- Venue Information: The venue name, city, and state are standard, while the street address is usually placed on a details card unless the location is private.
- Reception Details: When the reception is at a different location, it is commonly shared on a separate insert card.
- RSVP Guidance: Formal suites usually include a response card, and even online responses should be presented with polished language.
Getting the Wording Just Right
Traditional wording matters because it helps the invitation read as formal from the first line. The specific phrasing you choose should match the ceremony setting. Many couples use “request the honour of your presence” when the wedding is held in a house of worship. For a non-religious ceremony, “request the pleasure of your company” is the traditional alternative. Small choices like this make a big difference in keeping the tone consistent.
Hosting language also changes depending on family structure and who is paying for the wedding. If one set of parents is hosting, they’re typically listed on the host line. For divorced or remarried parents, formal etiquette generally lists names separately to avoid confusion. If you want to mention a deceased parent, you can do so respectfully with a “late” reference while still keeping the invitation clean and traditional.
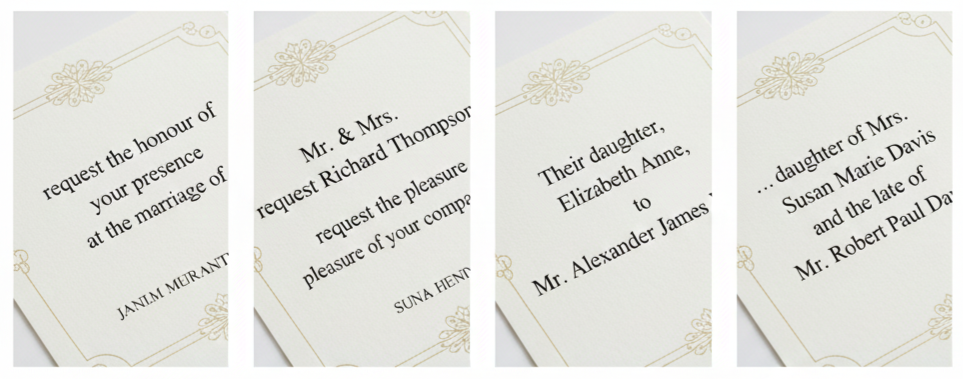
- Ceremony Wording: “Request the honour of your presence” is commonly used for religious ceremonies, while “request the pleasure of your company” suits non-religious celebrations.
- Hosting Structure: The host line
changes based on whether parents, both families, or the couple are hosting. sssa00000asdsadsads - Name Order: Traditional formatting places the bride’s name before the groom’s name, with full names preferred.
- Deceased Parent Reference: A respectful “late” mention can honor a parent without disrupting the invitation’s formal flow.
Design and Paper Choices That Make It Look and Feel Luxe
Design is where formal wedding invitations really shine. Formal doesn’t have to mean boring, and classic details can still feel personal when they’re chosen thoughtfully. Paper weight matters because it affects how the invitation feels in someone’s hand. Thick cardstock instantly signals quality, and cotton or linen papers tend to look and feel premium.
Typography also carries a lot of the “formal” energy. Serif fonts and classic scripts look timeless, and they print beautifully with traditional techniques like letterpress or engraving. Color palettes stay more refined as well, with shades like ivory, white, black, navy, and gold being common for formal suites. Then there are the finishing touches, like foil accents, wax seals, and envelope liners, which add polish without making the invitation feel overly busy.
- Paper Quality: Heavy cardstock, often cotton or linen blend, gives the invitation a premium feel and a more formal presentation.
- Classic Color Palette: Ivory, cream, navy, black, burgundy, and gold tend to read as timeless and formal.
- Typography Style: Serif fonts and elegant scripts feel traditional, readable, and suited to formal wedding invitations.
- Print Methods: Letterpress creates a debossed impression, engraving gives a raised ink look, and foil stamping adds metallic shine.
- Refined Extras: Wax seals, silk ribbons, and envelope liners can elevate the suite while keeping it tasteful.
Addressing Invitations the Right Way
Addressing is a major part of formal etiquette, and it’s one of the first things guests see. The outer envelope should use full names and proper titles, and the inner envelope, when used, clarifies exactly who is invited. That second envelope can be especially helpful for households where you want to specify whether children are included, whether a guest has a plus-one, or whether the invitation is meant for an individual rather than a couple.
Titles matter here. Doctors, military members, clergy, and other formally titled guests should be addressed using their correct honorifics. For plus-ones, it’s best to name the guest when possible rather than relying on “and Guest,” since naming feels more formal and more intentional. When children are invited, formal suites may list them under the parents on the inner envelope, though older children may receive separate invitations depending on the level of formality you want to maintain.

- Outer Envelope: Uses full names and titles, such as Mr., Mrs., Dr., or professional and military titles.
- Inner Envelope: Clarifies who is invited within the household and may use first names or a simplified version of titles.
- Professional Titles: Doctors, clergy, and military ranks should be written out correctly to keep the addressing formal and respectful.
- Plus-Ones: Naming the guest is the most formal approach, while “and Guest” works when the name is unknown.
- Children Included: Inner envelopes can list children beneath the parents, while older children may receive separate invitations for more formal events.
When to Send and How to Keep Things on Track
Formal invitations still follow a traditional timeline, and sticking to it makes planning easier. Save-the-dates typically go out several months before the wedding so guests can plan travel and time off. Formal invitations follow later, and they should arrive with enough time for guests to respond without feeling rushed. Destination weddings require more lead time, since guests will need to book flights and accommodations.
RSVP deadlines matter because they affect seating charts, catering, rentals, and final headcounts. Once the deadline passes, a polite follow-up is completely acceptable. The tone should stay calm and gracious, and a simple message that you’re finalizing counts is usually all you need.
- Save-The-Date Timing: Typically sent 6 to 8 months before the wedding, and 9 to 12 months before for destination weddings.
- Invitation Mailing Window: Commonly mailed 8 to 10 weeks before the wedding, and around 12 weeks before for destination events.
- RSVP Deadline: Often set 3 to 4 weeks before the wedding date to allow time for final planning.
- Polite Follow-Up: A friendly reminder after the deadline is acceptable, especially when final counts are due.
Making It Personal Without Losing the Formal Touch
Formal invitations can still feel personal, and the best personalization tends to be subtle. A custom monogram can tie the suite together. A venue illustration can add charm while staying elegant. Envelope liners can bring in color or pattern without overpowering the look of the invitation. These touches keep the suite from feeling generic, while still respecting formal etiquette.
Modern conveniences like wedding websites and online RSVPs can fit into a formal invitation suite as well. The trick is wording and placement. You can keep the main invitation traditional and place modern details on a separate card, written in formal language that matches the rest of the suite.
- Monogram Details: A simple monogram adds personalization while keeping the look formal and cohesive.
- Venue Illustration: A refined sketch of the venue feels special while still reading as classic.
- Envelope Liners: Patterns like toile, marble, or soft watercolor can add interest without changing the formal tone.
- Online RSVP Wording: Website and RSVP details should be written in formal language and placed on an insert card for a cleaner main invitation.
Mistakes You’ll Want to Avoid
One of the biggest mistakes is mixing casual language with a formal layout. A thick invitation card with elegant script loses its impact when the wording sounds like a casual party invite. Consistency matters, and the invitation should match the level of formality guests will experience on the day itself.
Details matter, too. Incorrect spelling, missing RSVP dates, unclear venue information, and formatting inconsistencies all make the suite feel less polished. Overcapitalization is another common issue, since formal invitations typically capitalize only proper nouns. Also, formal suites should avoid nicknames, since full legal names maintain a clean, traditional tone.
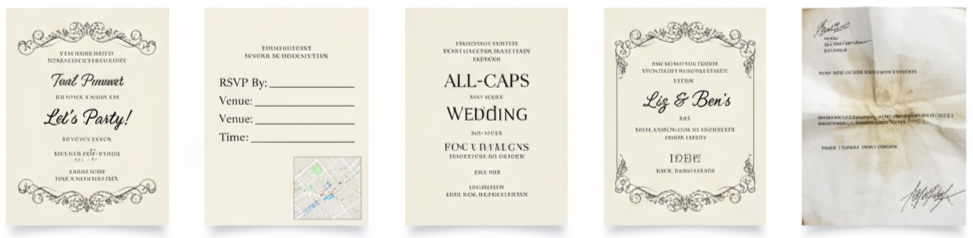
- Tone Mismatch: Casual phrases can undermine an otherwise formal invitation design.
- Missing Information: RSVP details, venue clarity, and correct timing are essential for guests.
- Formatting Issues: Overcapitalization and inconsistent style can make the invitation feel less refined.
- Nickname Use: Formal invitations typically use full legal names to maintain tradition and clarity.
- Rushed Production: Printing and mailing should allow time for proofs, corrections, and addressing.
Conclusion
Formal wedding invitations create a strong first impression, and they communicate the tone of your day before guests ever step into the venue. When the wording, paper, typography, and addressing all work together, the invitation suite feels intentional and elegant. A traditional approach can still feel personal when you add refined touches like a monogram, an envelope liner, or a thoughtfully written details card. With the right structure and consistent presentation, your invitations feel clear, polished, and worthy of the celebration you’re planning.
Key Takeaway: Formal wedding invitations work best when design choices, wording, and etiquette stay consistent, creating a polished suite that reflects a timeless, elegant celebration.
FAQs
Can we include registry information on a formal wedding invitation?
Registry details usually do not belong on the formal invitation itself. A wedding website or a separate word-of-mouth approach through close family and friends keeps the invitation suite focused on the ceremony and reception details.
How do we invite unmarried couples who live together?
Both names can appear on the outer envelope, typically on separate lines, and the inner envelope can reflect the same structure. This keeps the addressing clear and respectful while staying aligned with formal etiquette.
Is it okay to use colored envelopes for formal invites?
Colored envelopes can work well as long as the shade feels refined and matches the suite’s style. Deep navy, burgundy, and soft metallic tones tend to look formal, especially when paired with classic typography.
What’s the best way to handle dietary restrictions on the RSVP?
A simple line on the RSVP card works well, such as a request for guests to note dietary needs. This keeps the process organized and helps you avoid follow-up messages later.
Do we need to send formal invitations to family members we speak with regularly?
Formal invitations should go to every guest on the list, including close family members. This keeps everything consistent, supports planning, and ensures every guest has the same information in the same format.
Florida Beach Weddings
| Beach | Vibe | Scenery | Nearby Amenities |
| Clearwater | Lively, scenic | White sand, sunsets | Resorts, restaurants |
| Siesta Key | Calm, romantic | Powdery sand, clear water | Vacation rentals, quiet spots |
| Miami Beach | Stylish, vibrant | City-ocean views | Hotels, nightlife |
| Destin | Relaxed, family-friendly | Emerald water, soft sand | Coastal venues, casual dining |
| Key West | Tropical, fun | Palms, island feel | Historic spots, beach bars |
Why Choose Florida for a Beach Wedding
Florida beach weddings feel simple in the best way—sun, sand, ocean views, and a natural setting that already looks “decorated.” We also get a wide range of coastlines and wedding styles in one state, so it’s easy to match the location to the kind of day you want. Instead of forcing a beach wedding to fit your plans, Florida lets you shape the plans around a place that already fits.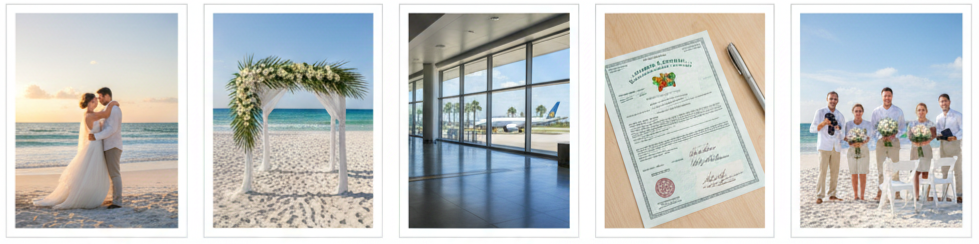
- Consistently Warm Climate: Florida stays wedding-friendly for most of the year, which keeps outdoor planning realistic for couples who want a ceremony by the water without winter weather worries.
- Diverse Coastal Settings: We can choose from soft Gulf Coast sand, energetic Atlantic beaches, and island-style scenery in the Keys, which makes it easier to match the backdrop to your theme.
- Convenient Travel Options: Florida has major airports, strong hotel inventory, and lots of vacation rentals, so guests usually have flexible ways to arrive and stay.
- Simple Marriage Rules: Florida does not require you to live in the state to get married, and couples can use a license statewide once it’s issued.
- Strong Vendor Availability: Beach wedding pros are everywhere in Florida—photographers, coordinators, officiants, florists, and rental teams who already know coastal setups.
Top Beach Wedding Locations in Florida
Florida has hundreds of ceremony-worthy beaches, yet a few stand out for scenery, convenience, and overall wedding experience. We can narrow the best fit by thinking about your preferred vibe first—quiet and intimate, stylish and energetic, or tropical and laid-back.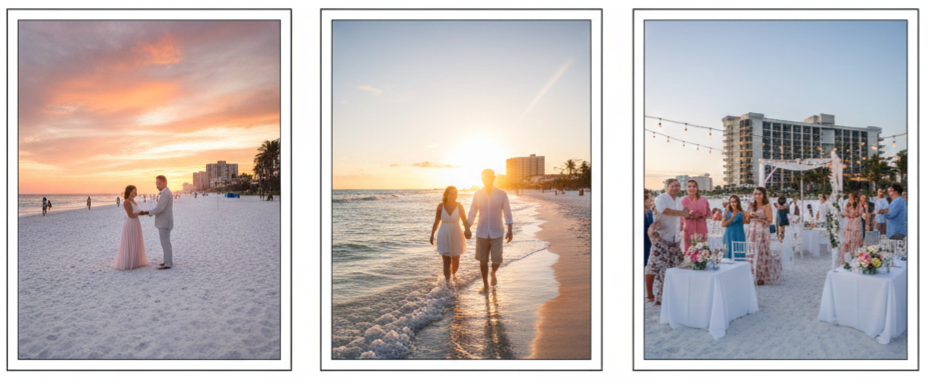
Clearwater Beach
We get sugar-soft sand, glowing sunsets, and a lively area packed with resorts and dining, which works well for couples who want an easy guest experience with plenty to do.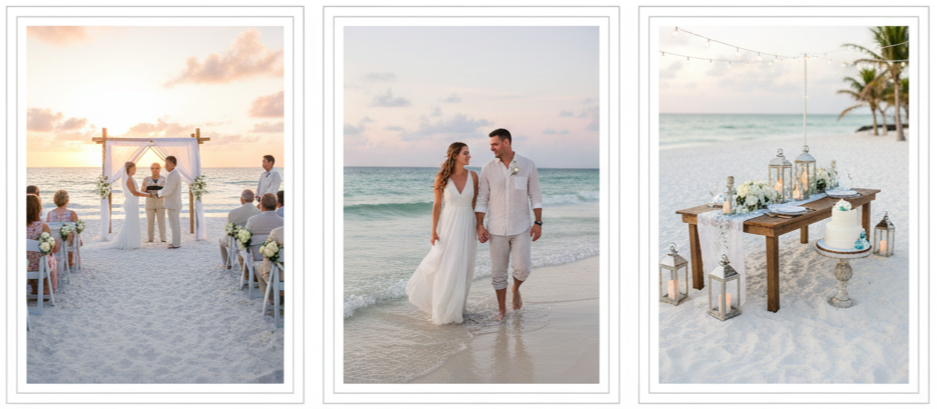
Siesta Key
We get a calmer, more romantic atmosphere with famously fine white sand, making it a strong pick for intimate ceremonies and relaxed weekend celebrations.
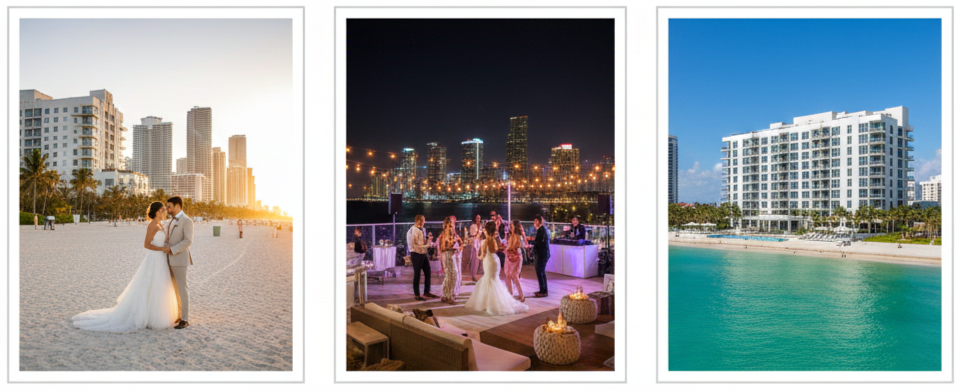
Miami Beach
We get a bold, high-energy destination with luxury hotels and a city-meets-ocean feel, which suits couples who want sleek photos and nightlife nearby.
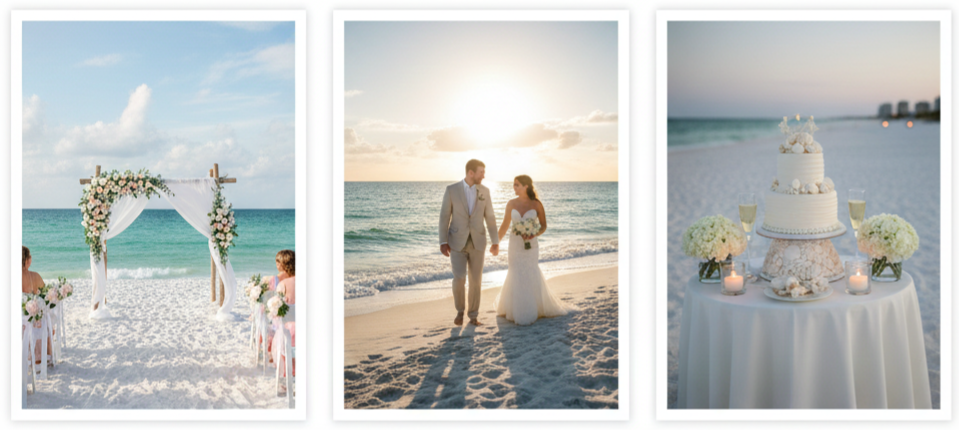
Destin
We get emerald-toned water and a slower coastal pace in the Panhandle, which works well for family-friendly weddings and couples who want scenic views without a big-city feel.
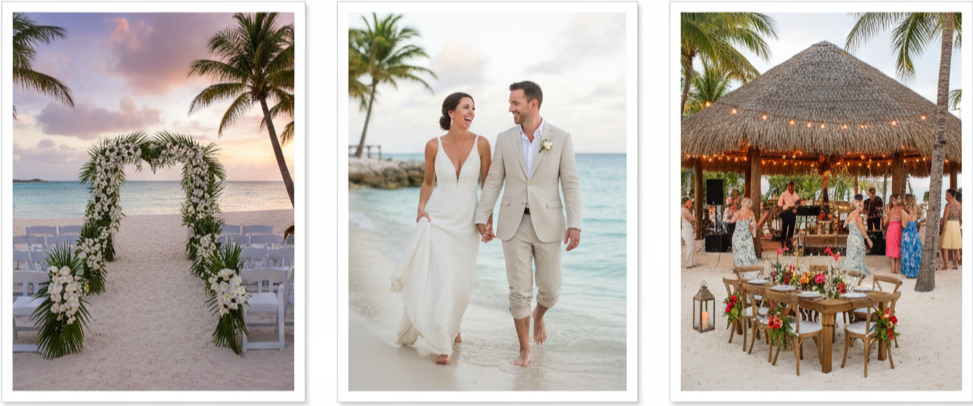
Key West
We get tropical character, palm-lined scenery, and a vacation-first mood, which fits destination weddings that want a fun, island-style celebration around the ceremony.
Best Time of Year to Get Married on a Florida Beach
Florida lets us plan weddings across the calendar, yet certain seasons make the day smoother for comfort, photos, and guest experience. We usually aim for months with mild heat, lower storm risk, and manageable crowds, especially when the ceremony happens on a public shoreline.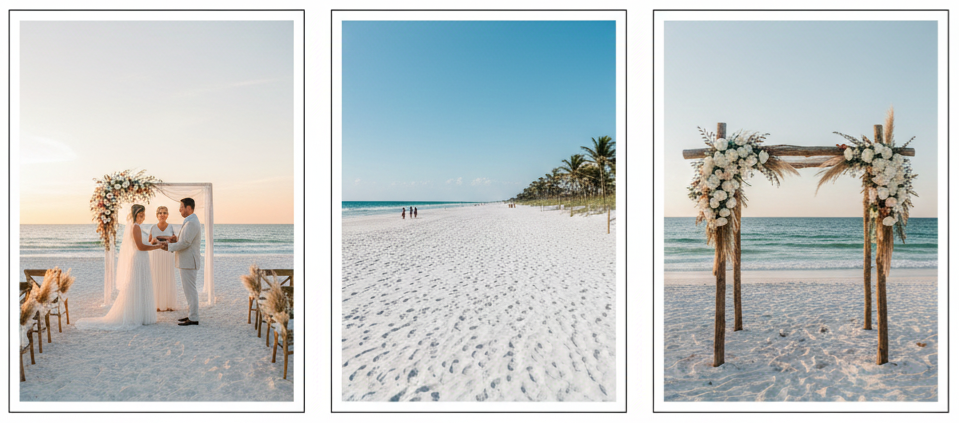
Fall Dates (October–November)
We get pleasant temperatures and fewer summer-style afternoon storms, plus beaches feel less packed than peak holiday periods.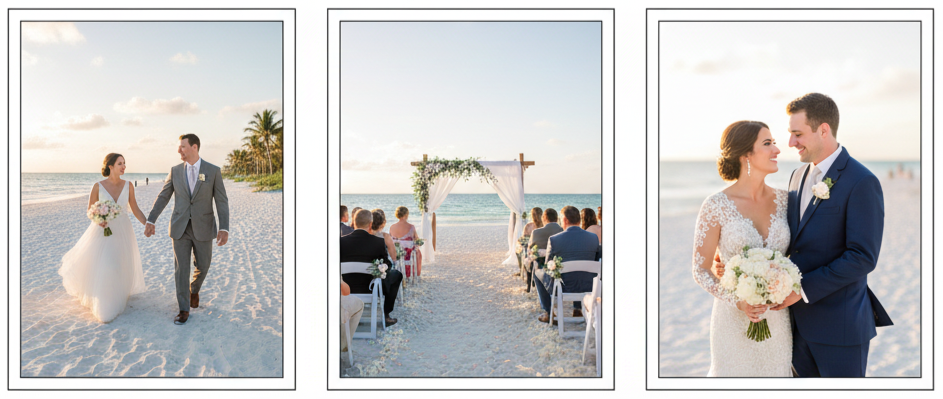
Winter Dates (December–February)
We get mild coastal weather—especially in South Florida—along with a comfortable ceremony experience for guests wearing formal outfits.
Spring Dates (March–May)
We get bright skies and balanced temperatures, which makes spring a popular window for beach ceremonies and sunset photography.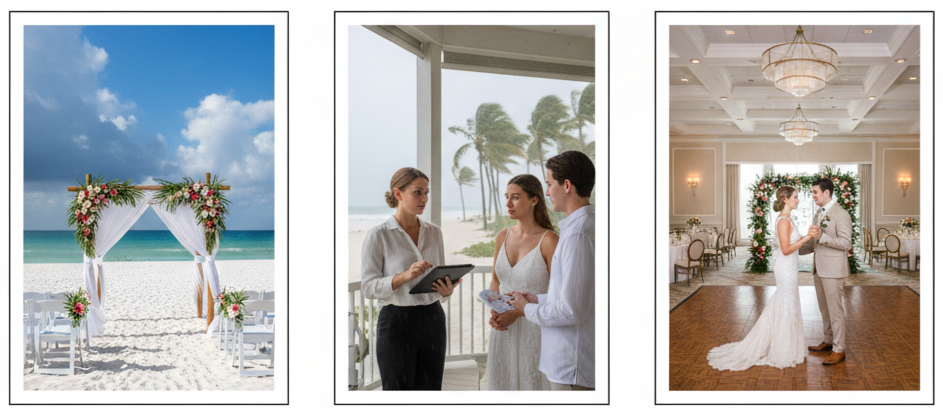
Hurricane Season Awareness (June–November)
We plan with extra care during hurricane season by using flexible vendors, weather-ready timelines, and a solid indoor backup option.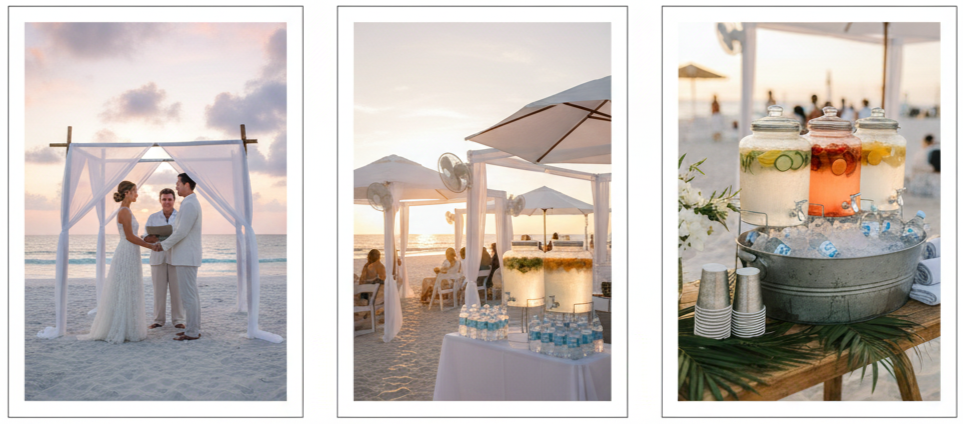
Summer Heat Considerations (July–August)
We plan around humidity and sun intensity by choosing sunrise or late-day ceremonies and offering shade and hydration.
Planning Tips for a Florida Beach Wedding
Beach weddings look effortless in photos, yet the real success comes from planning around wind, sun, sand, sound, and local rules. We keep everything comfortable and organized by focusing on permits, timing, vendor experience, attire choices, and weather contingencies.
- Beach Permits First: We confirm local permit rules early, especially for chairs, arches, amplified sound, larger guest groups, or vendor vehicles near the sand.
- Ceremony Timing Strategy: We plan for sunrise or sunset when possible, since temperatures feel better and the light looks softer and more flattering in photos.
- Crowd and Privacy Planning: We choose less busy beach access points, consider weekday ceremonies, and schedule outside peak hours to reduce foot traffic behind the ceremony.
- Wind-Proof Setup Choices: We use weighted décor, anchored arches, low-profile arrangements, and secure signage so the beach breeze does not turn styling into a cleanup project.
- Sound and Music Control: We choose portable speaker setups or acoustic music options and confirm local noise rules to keep the ceremony audible without violating ordinances
- Comfort-Ready Guest Details: We provide water, sunscreen, sunglasses, handheld fans, and a simple shaded area when the forecast calls for strong sun.
- Beach-Friendly Attire: We choose breathable fabrics, secure hairstyles, and footwear that works on sand, including flats, sandals, wedges, or barefoot styling.
- Photo Lighting Plans: We build extra time for portraits at golden hour and keep midday shots limited when glare and harsh shadows feel strongest.
- Weather Backup Options: We secure an indoor venue nearby, a covered pavilion, or a tented solution so rain does not derail the entire schedule.
Beach Wedding Packages and Services
Many couples choose a package for a Florida beach wedding because it reduces decision fatigue. Instead of coordinating separate rentals, staffing, timing, and setup, a package usually groups the essentials into one plan. We still want to confirm exactly what each provider includes, since “package” can mean very different things across companies and locations.
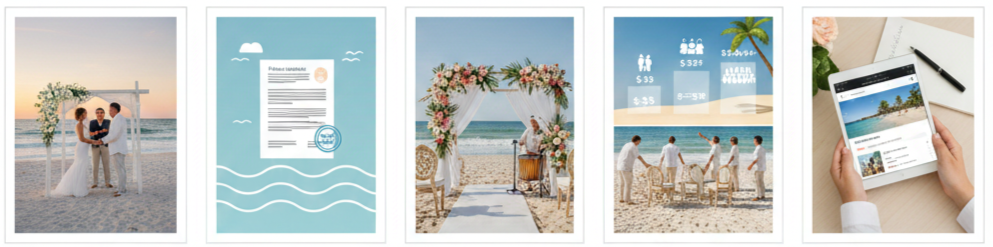
- Common Package Inclusions: We typically see an officiant, a ceremony setup, simple décor, coordination support, and photography as core items in many Florida beach packages.
- Permit Support Options: We often see providers assist with permit guidance or paperwork steps, which matters most on regulated public beaches.
- Add-On Services: We often see videography, upgraded florals, aisle décor, seating upgrades, live music, and reception coordination available as optional additions.
- Price Range Expectations: We commonly see elopement-style options starting around the low thousands, while full-service weddings with expanded décor and reception services can climb well beyond that depending on guest count and venue needs.
- Vendor Experience Advantage: We benefit from teams who already know tides, wind patterns, beach access logistics, and the exact setup process for specific shores.
- Smart Booking Approach: We review galleries, confirm timelines, read recent reviews, and ask about day-of staffing so the plan stays realistic for the beach conditions.
Décor and Themes for Florida Beach Weddings
The beach brings natural color and texture, so décor works best when it supports the scenery rather than fighting it. We keep styling choices clean, stable in wind, and easy to set up and remove. We also plan around local rules, since some beaches limit what can be placed in sand or left behind.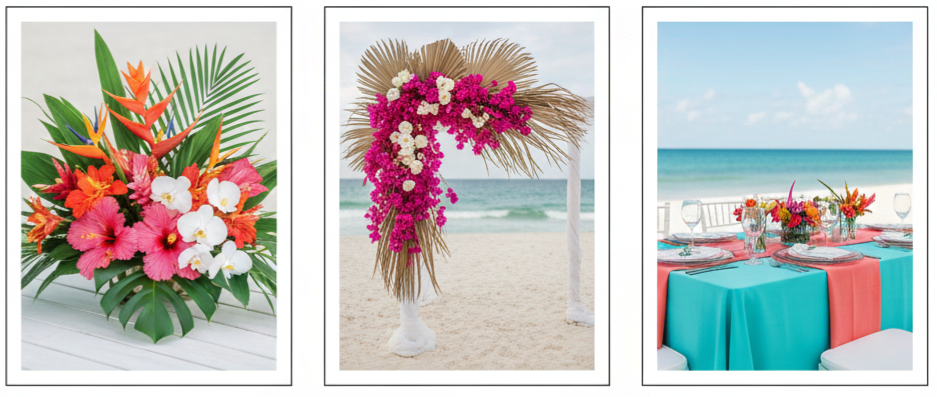
Tropical Theme Styling
We use vibrant florals, palm accents, and bright color palettes that match Florida’s coastal energy without overwhelming the ceremony space.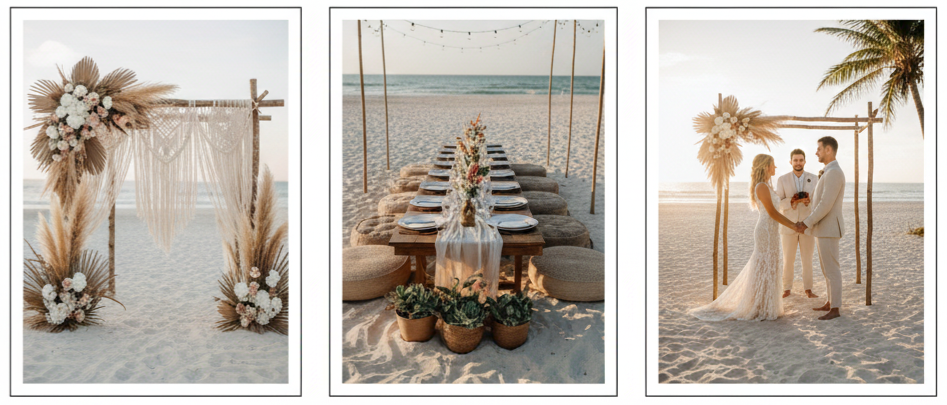
Boho Theme Details
We use soft neutrals, macramé textures, natural wood tones, and relaxed arrangements that feel warm and romantic against the ocean backdrop.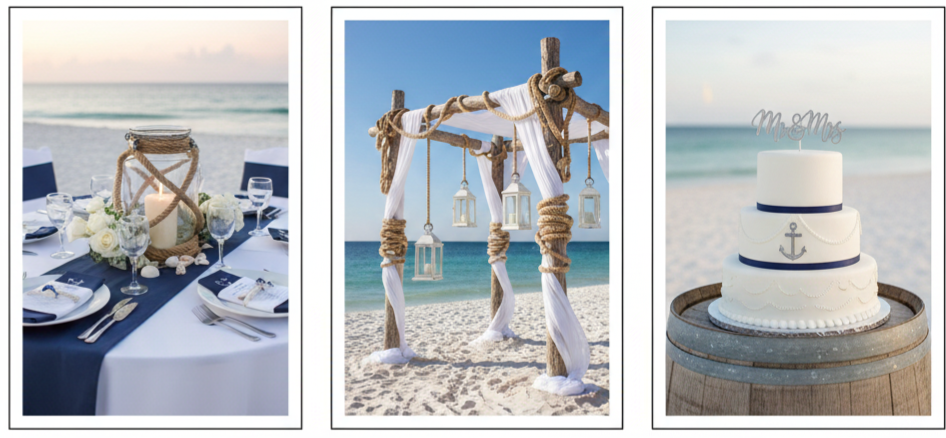
Nautical Theme Direction
We use navy-and-white palettes, rope textures, coastal lanterns, and clean lines that feel classic and polished on the shoreline.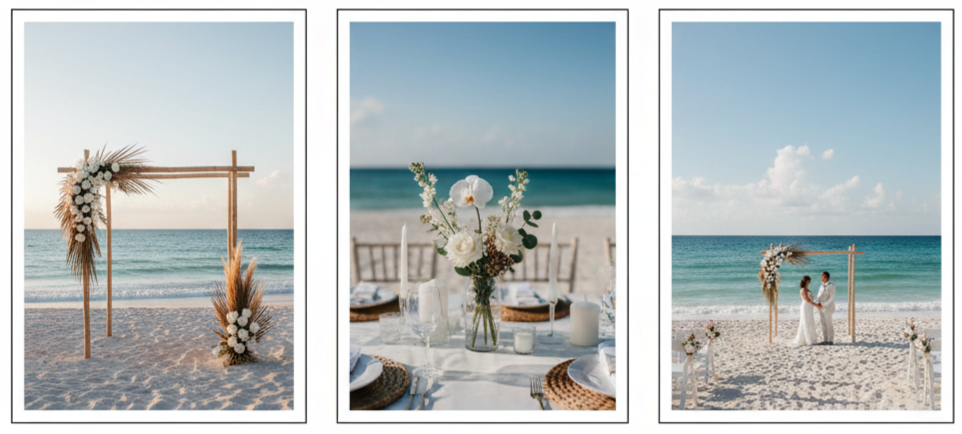
Minimalist Theme Approach
We use a simple arch, restrained florals, and neutral colors so the water and sky become the centerpiece.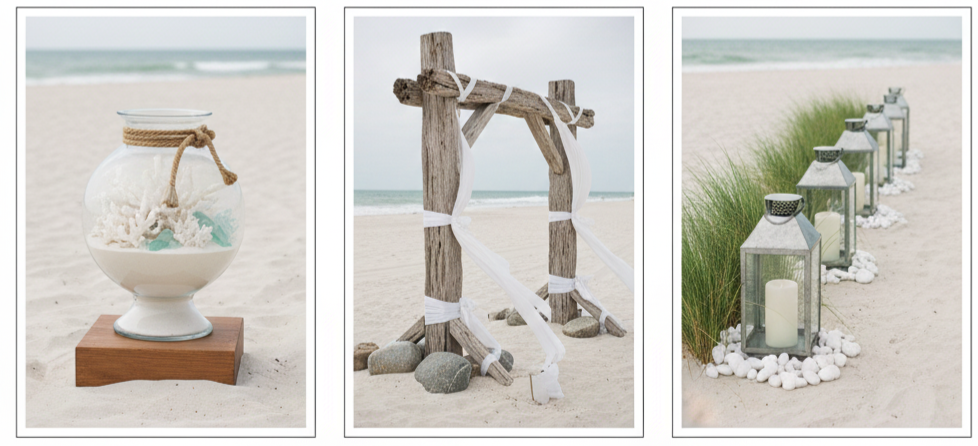
Wind-Safe Décor Choices
We pick weighted vases, anchored arches, secured aisle markers, and sturdy signage so everything stays in place.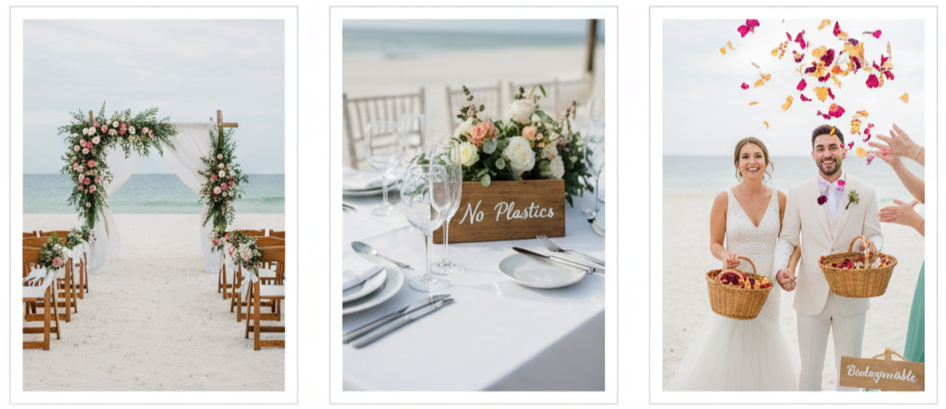
Eco-Friendly Styling Options
We use reusable rentals, avoid plastics, skip balloon releases, and choose biodegradable petals when tossing items is allowed.
Budgeting for a Florida Beach Wedding
A Florida beach wedding can feel surprisingly manageable budget-wise, especially when we compare it to traditional venues with heavy indoor décor needs. Costs still vary widely based on guest count, location, season, vendor demand, and how much we want handled by a planner or package provider.
- Elopement Budget Range: We often see lower-cost ceremonies for just the couple or a small group, especially when styling stays simple and the timeline stays short.
- Small Wedding Budget Range: We typically see mid-range costs for weddings up to around a few dozen guests, especially when we include seating, décor upgrades, and professional photo coverage.
- Full-Scale Wedding Budget Range: We typically see higher budgets when we add receptions, larger rentals, premium florals, entertainment, and more complex coordination.
- Off-Season Savings: We often reduce costs by choosing less in-demand months, since many vendors price based on seasonal demand.
- Weekday Booking Benefits: We often lower vendor minimums by booking Monday through Thursday, especially for popular locations.
- Guest Count Control: We usually see the biggest savings by keeping the guest list intentional, since seating, catering, rentals, and staffing scale quickly.
- Hidden Cost Awareness: We plan for permits, transportation, lodging, rentals, gratuities, and weather backup expenses so the final number stays accurate.
Legal Requirements and Marriage License Info
Florida keeps marriage licensing straightforward, which is a major reason couples choose the state for destination weddings. We still want to confirm the exact rules for the county where the license is issued, since small details like fees and hours can vary. The most important part is handling the license early enough to avoid last-minute stress.
- Gather Valid Identification: We bring a valid photo ID such as a driver’s license or passport so the clerk can verify identity.
- Apply at a County Clerk’s Office: We apply through any Florida county clerk, since the license can be used statewide once issued.
- Confirm Waiting Period Rules: We check whether a waiting period applies, since Florida residents may have a short wait unless they complete a premarital course, while out-of-state couples typically do not face the same wait.
- Pay the License Fee: We pay the required fee at the clerk’s office, and we ask about discounts that may apply when a premarital course is completed.
- Use the License Within the Valid Window: We schedule the ceremony within the license validity period so it does not expire before the wedding date.
- Complete Signatures After the Ceremony: We ensure the officiant and required witnesses sign the license so the marriage can be properly recorded.
Conclusion
Florida beach weddings give us the freedom to plan a ceremony that feels scenic, relaxed, and memorable without overcomplicating the experience. With the right location, a season that suits your comfort level, permit-ready planning, and a weather backup strategy, the day stays smooth from arrival to final photos. Whether we choose a quiet shoreline for an intimate ceremony or a well-known beach destination with nearby resorts, Florida makes it practical to create a coastal wedding day that feels polished and personal.
Key Takeaway: Florida’s coastline, flexible wedding options, and straightforward marriage license process make it one of the most dependable choices for couples planning a beach ceremony with real-world logistics in mind.
FAQs
Can we bring our own decorations to a Florida beach wedding?
Yes, we can bring décor, and we keep it compliant by choosing items that are easy to remove, safe for the environment, and allowed under the local beach rules.
Is a rehearsal necessary for a beach wedding?
A rehearsal is not required, yet we often plan a quick walk-through when the wedding party is larger or when music cues and timing need to feel smooth.
Are Florida beach weddings suitable for large guest counts?
Yes, larger groups can work, and we plan ahead with the right beach area, seating logistics, extra coordination support, and any permits required for bigger setups.
How far in advance should we book vendors for a Florida beach wedding?
We usually book key vendors 6 to 9 months ahead, especially for peak spring and fall dates when popular photographers, planners, and officiants fill their calendars early.
Can we legally marry barefoot on the sand?
Yes, we can marry barefoot, since Florida’s legal requirements focus on licensing and proper completion of documents rather than attire.